
오늘은 neptune.ai 라는 툴을 소개시켜 드리려 합니다.
Jupyter는 아는데…. Neptune은 또 뭐여…. 암튼 이 분야는 참.. 태양계를 좋아하는 듯합니다.
이는 NN 실험을 편하고 효율적으로 할 수 있게 도와주는 툴입니다.
각 실험 세팅 별로 Hyper parameter, Metrics를 기록하고 시각화하여 비교할 수 있습니다.
그리고 개인에겐 100GB의 저장소를 제공하기 때문에 타인과 공유도 가능해요!
어찌보면 Weights & Biases 랑 비슷하죠.
다음은 Neptune docs 에서 가져온 Neptune의 특징입니다.
그럼 실제로 한번 써보도록 하겠습니다.
Sign up 은 넘어갑니다.
기존 환경에서 쓰실 분들은 쓰셔도 됩니다.
저는 따로 환경을 만들어서 테스트를 했습니다.
conda create -n neptune python=3.7

conda activate neptune

conda install psutil matplotlib tensorflow-gpu # 혹은 tensorflow
Neptune을 설치합니다.
conda를 쓰시는 분들께 보통 conda install 로 설치하라고 말씀을 드리지만.. 이번엔 특별히 pip install로 설치를 추천드립니다.
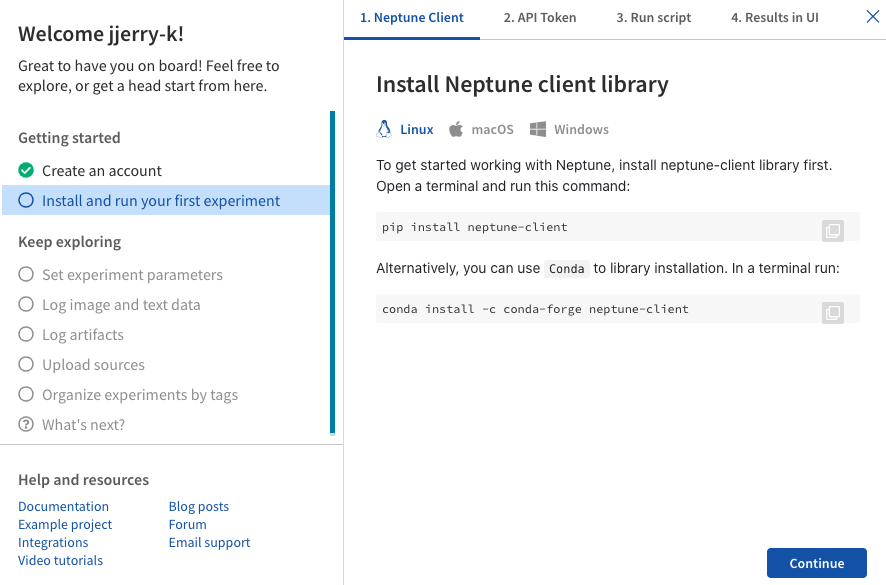
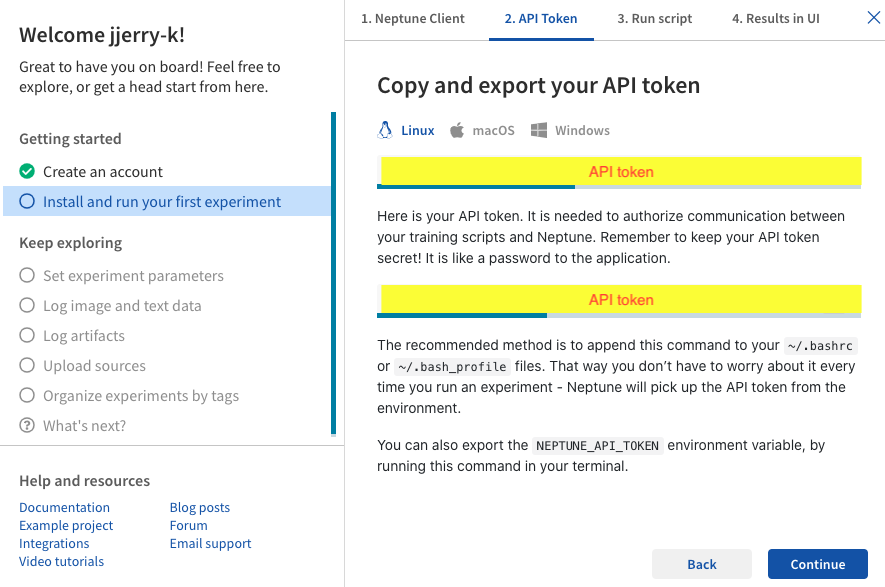
설치 후 자신이 사용하는 OS에 맞춰서 API token을 PC에 기입(?) 해주세요.
여기까지 하면 세팅은 끝납니다. 그 이후에 Run script, Result in UI 부분은 하고 싶으신 분만 해보세요!
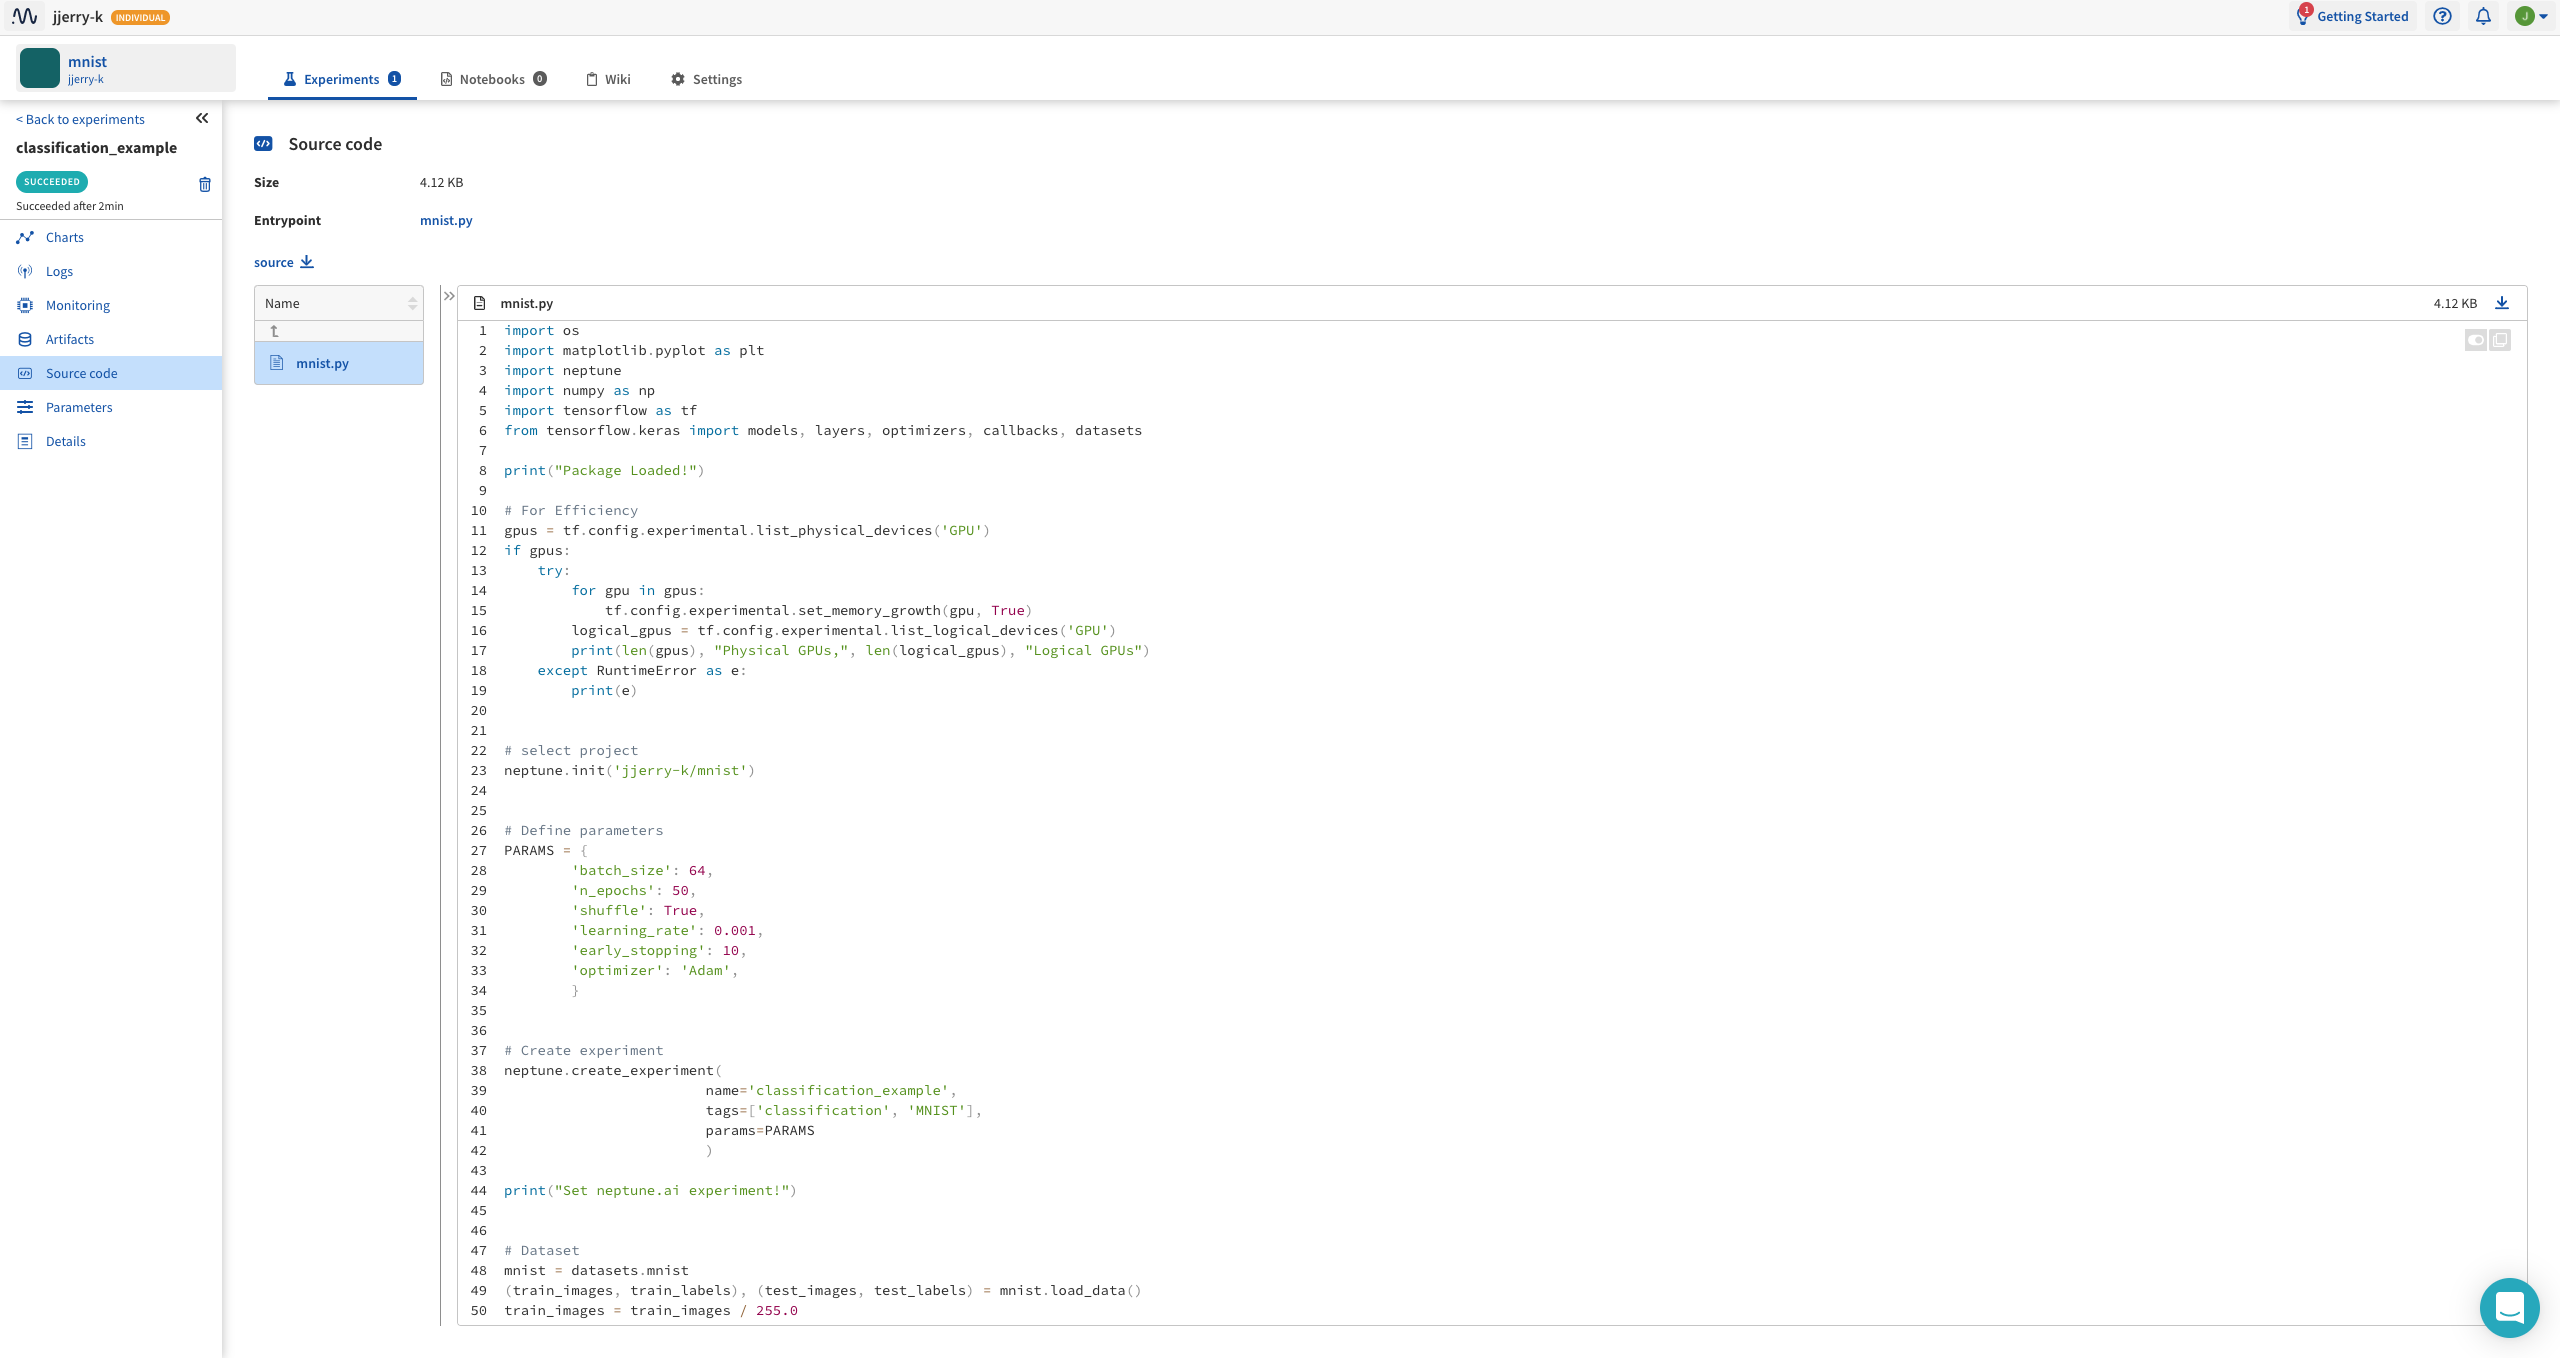
다음과 같은 코드를 작성합니다.
import hashlib
import os
import tempfile

import matplotlib.pyplot as plt
import neptune
import numpy as np
import tensorflow as tf
from tensorflow.keras import models, layers, optimizers, callbacks, datasets

# For Efficiency
gpus = tf.config.experimental.list_physical_devices('GPU')
if gpus:
    try:
        for gpu in gpus:
            tf.config.experimental.set_memory_growth(gpu, True)
        logical_gpus = tf.config.experimental.list_logical_devices('GPU')
        print(len(gpus), "Physical GPUs,", len(logical_gpus), "Logical GPUs")
    except RuntimeError as e:
        print(e)


# select project
neptune.init('jjerry-k/mnist')

# Define parameters
PARAMS = {'batch_size': 64,
          'n_epochs': 100,
          'shuffle': True,
          'learning_rate': 0.001,
          'early_stopping': 10,
          'optimizer': 'Adam',
          }

# Create experiment
neptune.create_experiment(name='classification_example',
                          tags=['classification', 'MNIST'],
                          params=PARAMS)

# Dataset
mnist = datasets.mnist
(train_images, train_labels), (test_images, test_labels) = mnist.load_data()
train_images = train_images / 255.0
test_images = test_images / 255.0

class_names = [str(i) for i in range(10)]

neptune.set_property('class_names', class_names)

for j, class_name in enumerate(class_names):
    plt.figure(figsize=(10, 10))
    label_ = np.where(train_labels == j)
    for i in range(9):
        plt.subplot(3, 3, i + 1)
        plt.xticks([])
        plt.yticks([])
        plt.grid(False)
        plt.imshow(train_images[label_[0][i]], cmap=plt.cm.binary)
        plt.xlabel(class_names[j])
    neptune.log_image('example_images', plt.gcf())

def lr_scheduler(epoch):
    if epoch < 10:
        new_lr = PARAMS['learning_rate']
    else:
        new_lr = PARAMS['learning_rate'] * np.exp(0.1 * ((epoch//50)*50 - epoch))

    neptune.log_metric('learning_rate', new_lr)
    return new_lr

# Model
model = models.Sequential([
    layers.Flatten(input_shape=(28, 28)),
    layers.Dense(128, activation='relu'),
    layers.Dense(len(class_names), activation='softmax')
])

if PARAMS['optimizer'] == 'Adam':
    optimizer = optimizers.Adam(
        learning_rate=PARAMS['learning_rate'],
    )
elif PARAMS['optimizer'] == 'Nadam':
    optimizer = optimizers.Nadam(
        learning_rate=PARAMS['learning_rate'],
    )
elif PARAMS['optimizer'] == 'SGD':
    optimizer = optimizers.SGD(
        learning_rate=PARAMS['learning_rate'],
    )

model.compile(optimizer=optimizer,
              loss='sparse_categorical_crossentropy',
              metrics=['accuracy'])

# Log model summary
model.summary(print_fn=lambda x: neptune.log_text('model_summary', x))

def log_train_data(logs):
    neptune.log_metric('epoch_acc', logs['accuracy'])
    neptune.log_metric('epoch_loss', logs['loss'])

def log_val_data(logs):
    # Evaluate model
    eval_metrics = model.evaluate(test_images, test_labels, verbose=0)
    for j, metric in enumerate(eval_metrics):
        neptune.log_metric('eval_' + model.metrics_names[j], metric)

# Training Network
model.fit(train_images, train_labels,
          batch_size=PARAMS['batch_size'],
          epochs=PARAMS['n_epochs'],
          shuffle=PARAMS['shuffle'],
          validation_data=[test_images, test_labels]
          callbacks=[callbacks.LambdaCallback(on_epoch_end=lambda epoch, logs: log_train_data(logs)),
                     callbacks.LambdaCallback(on_epoch_end=lambda epoch, logs: log_valdata(logs)),
                     callbacks.EarlyStopping(patience=PARAMS['early_stopping'],
                                                   monitor='accuracy',
                                                   restore_best_weights=True),
                     callbacks.LearningRateScheduler(lr_scheduler)]
          )

# Log model weights
with tempfile.TemporaryDirectory(dir='.') as d:
    prefix = os.path.join(d, 'model_weights')
    model.save_weights(os.path.join(prefix, 'model'))
    for item in os.listdir(prefix):
        neptune.log_artifact(os.path.join(prefix, item),
                             os.path.join('model_weights', item))
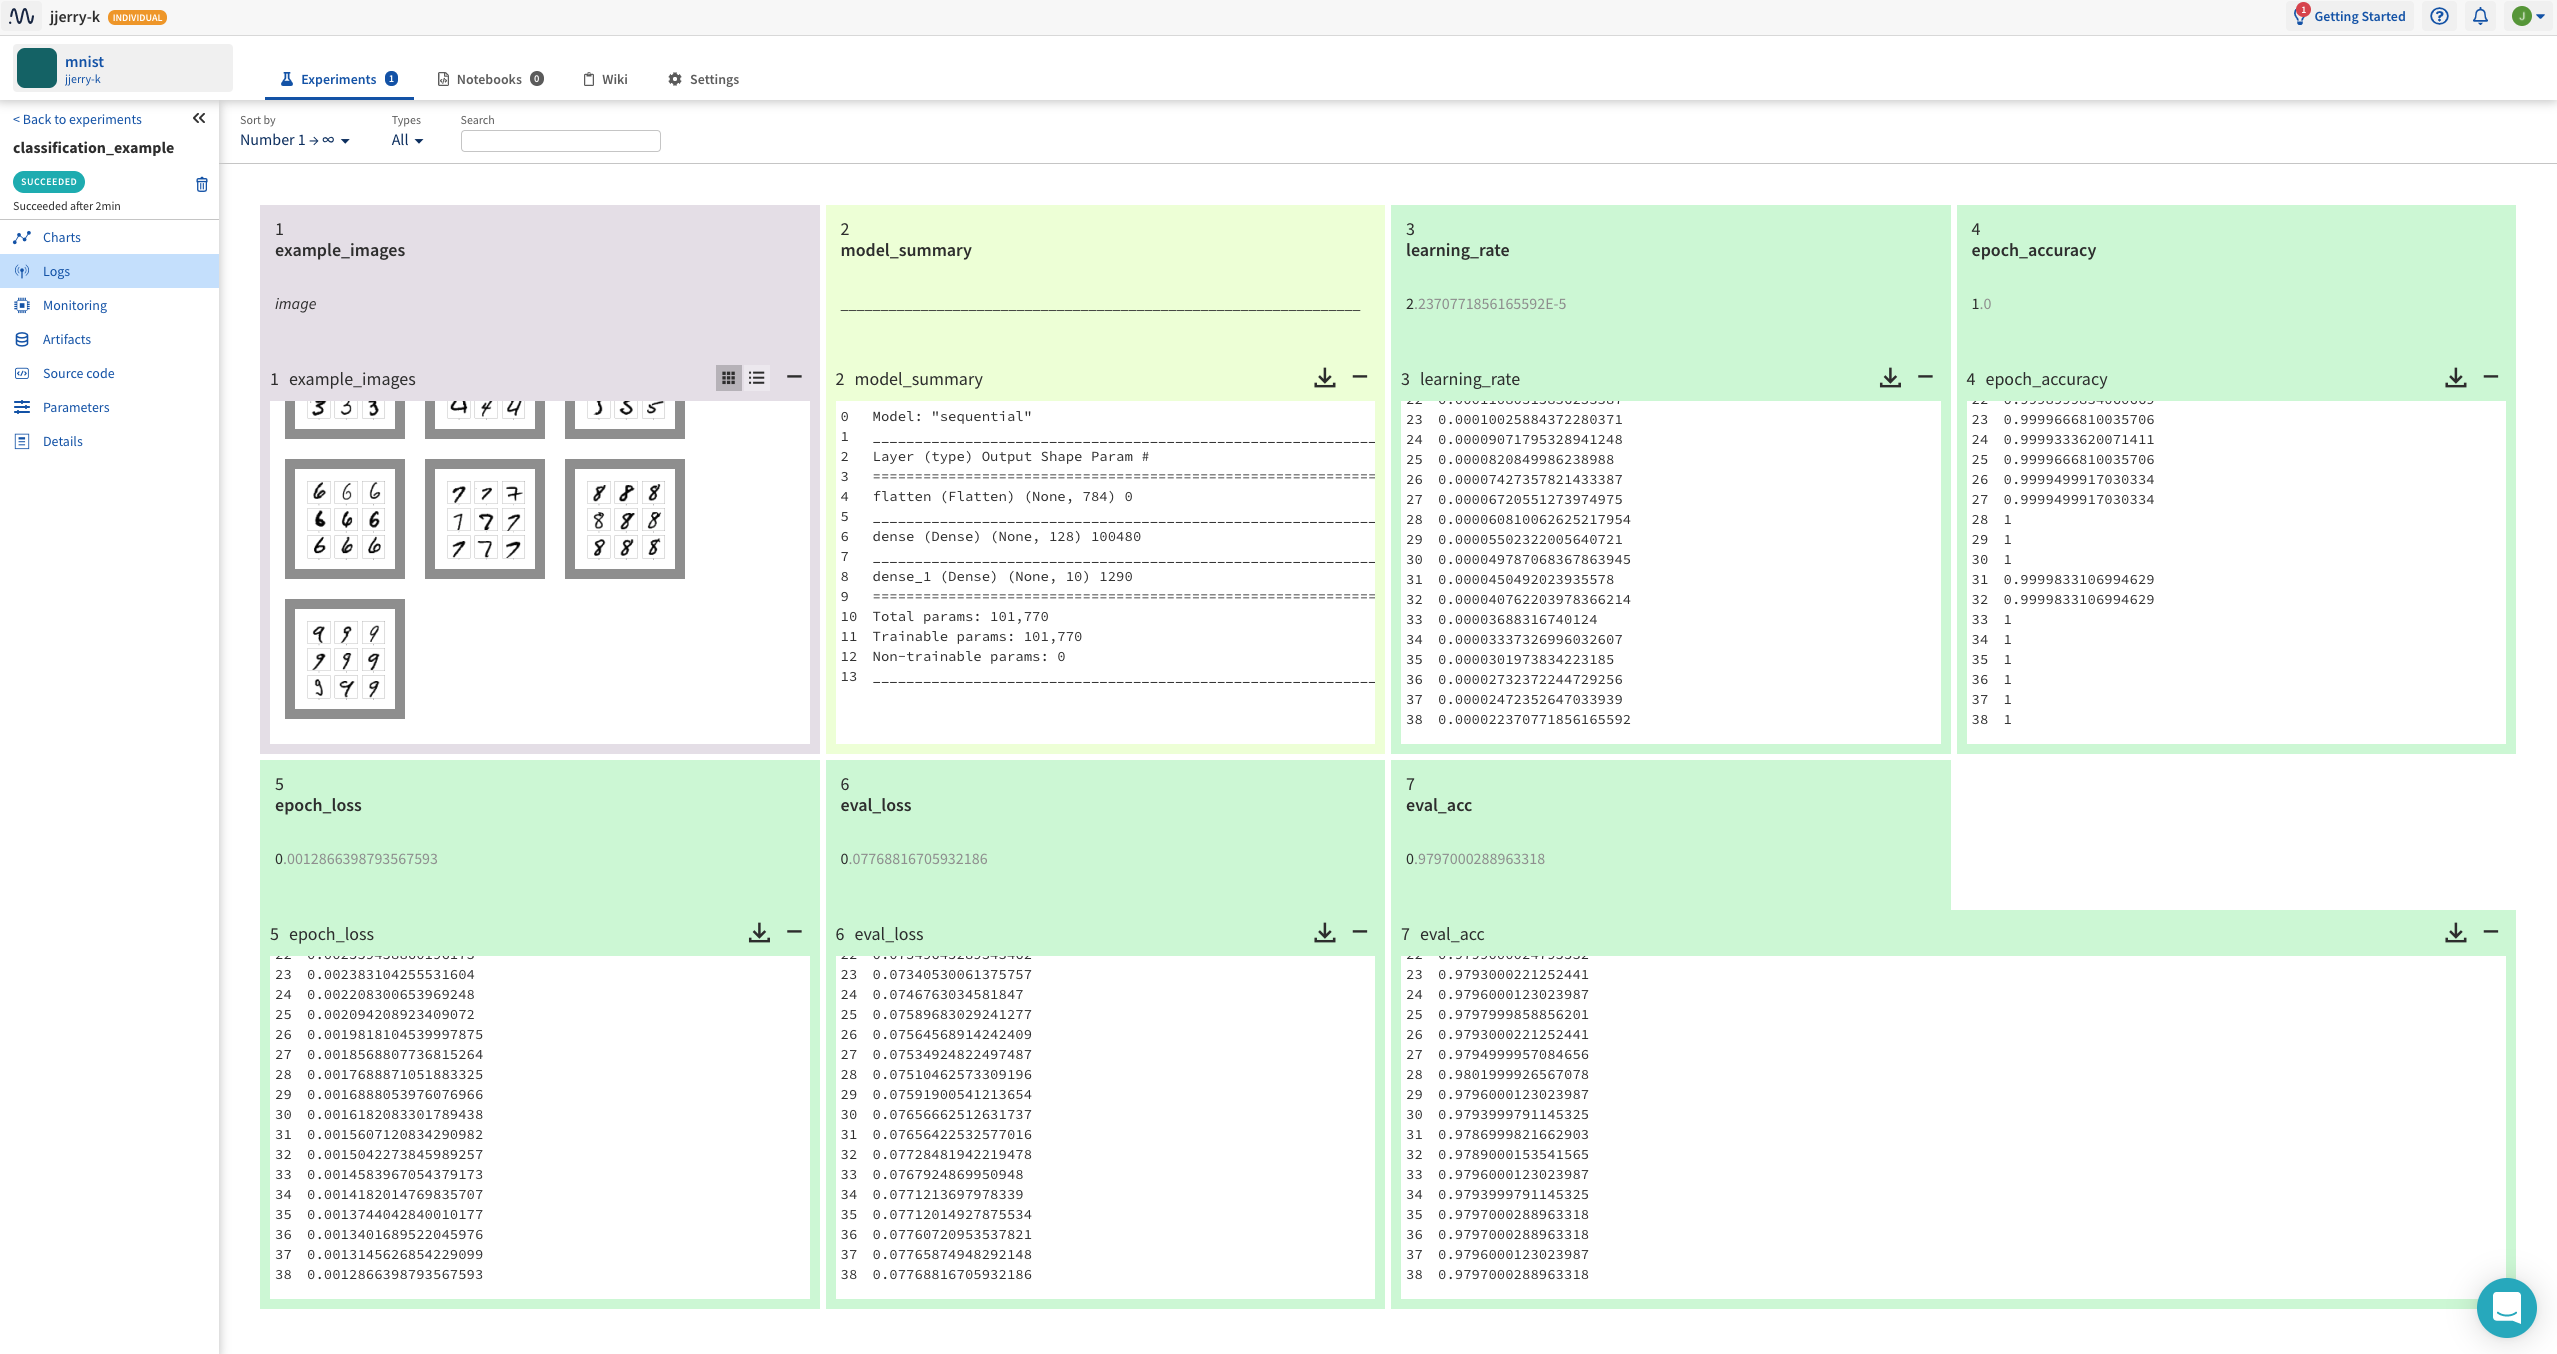
neptune에는 총 7개의 탭이 있습니다.
각각 예시를 보시면 역할을 이해하실 수 있습니다.
여기에는 neptune.log_metric()을 사용한 변수들이 그래프로 기록됩니다.
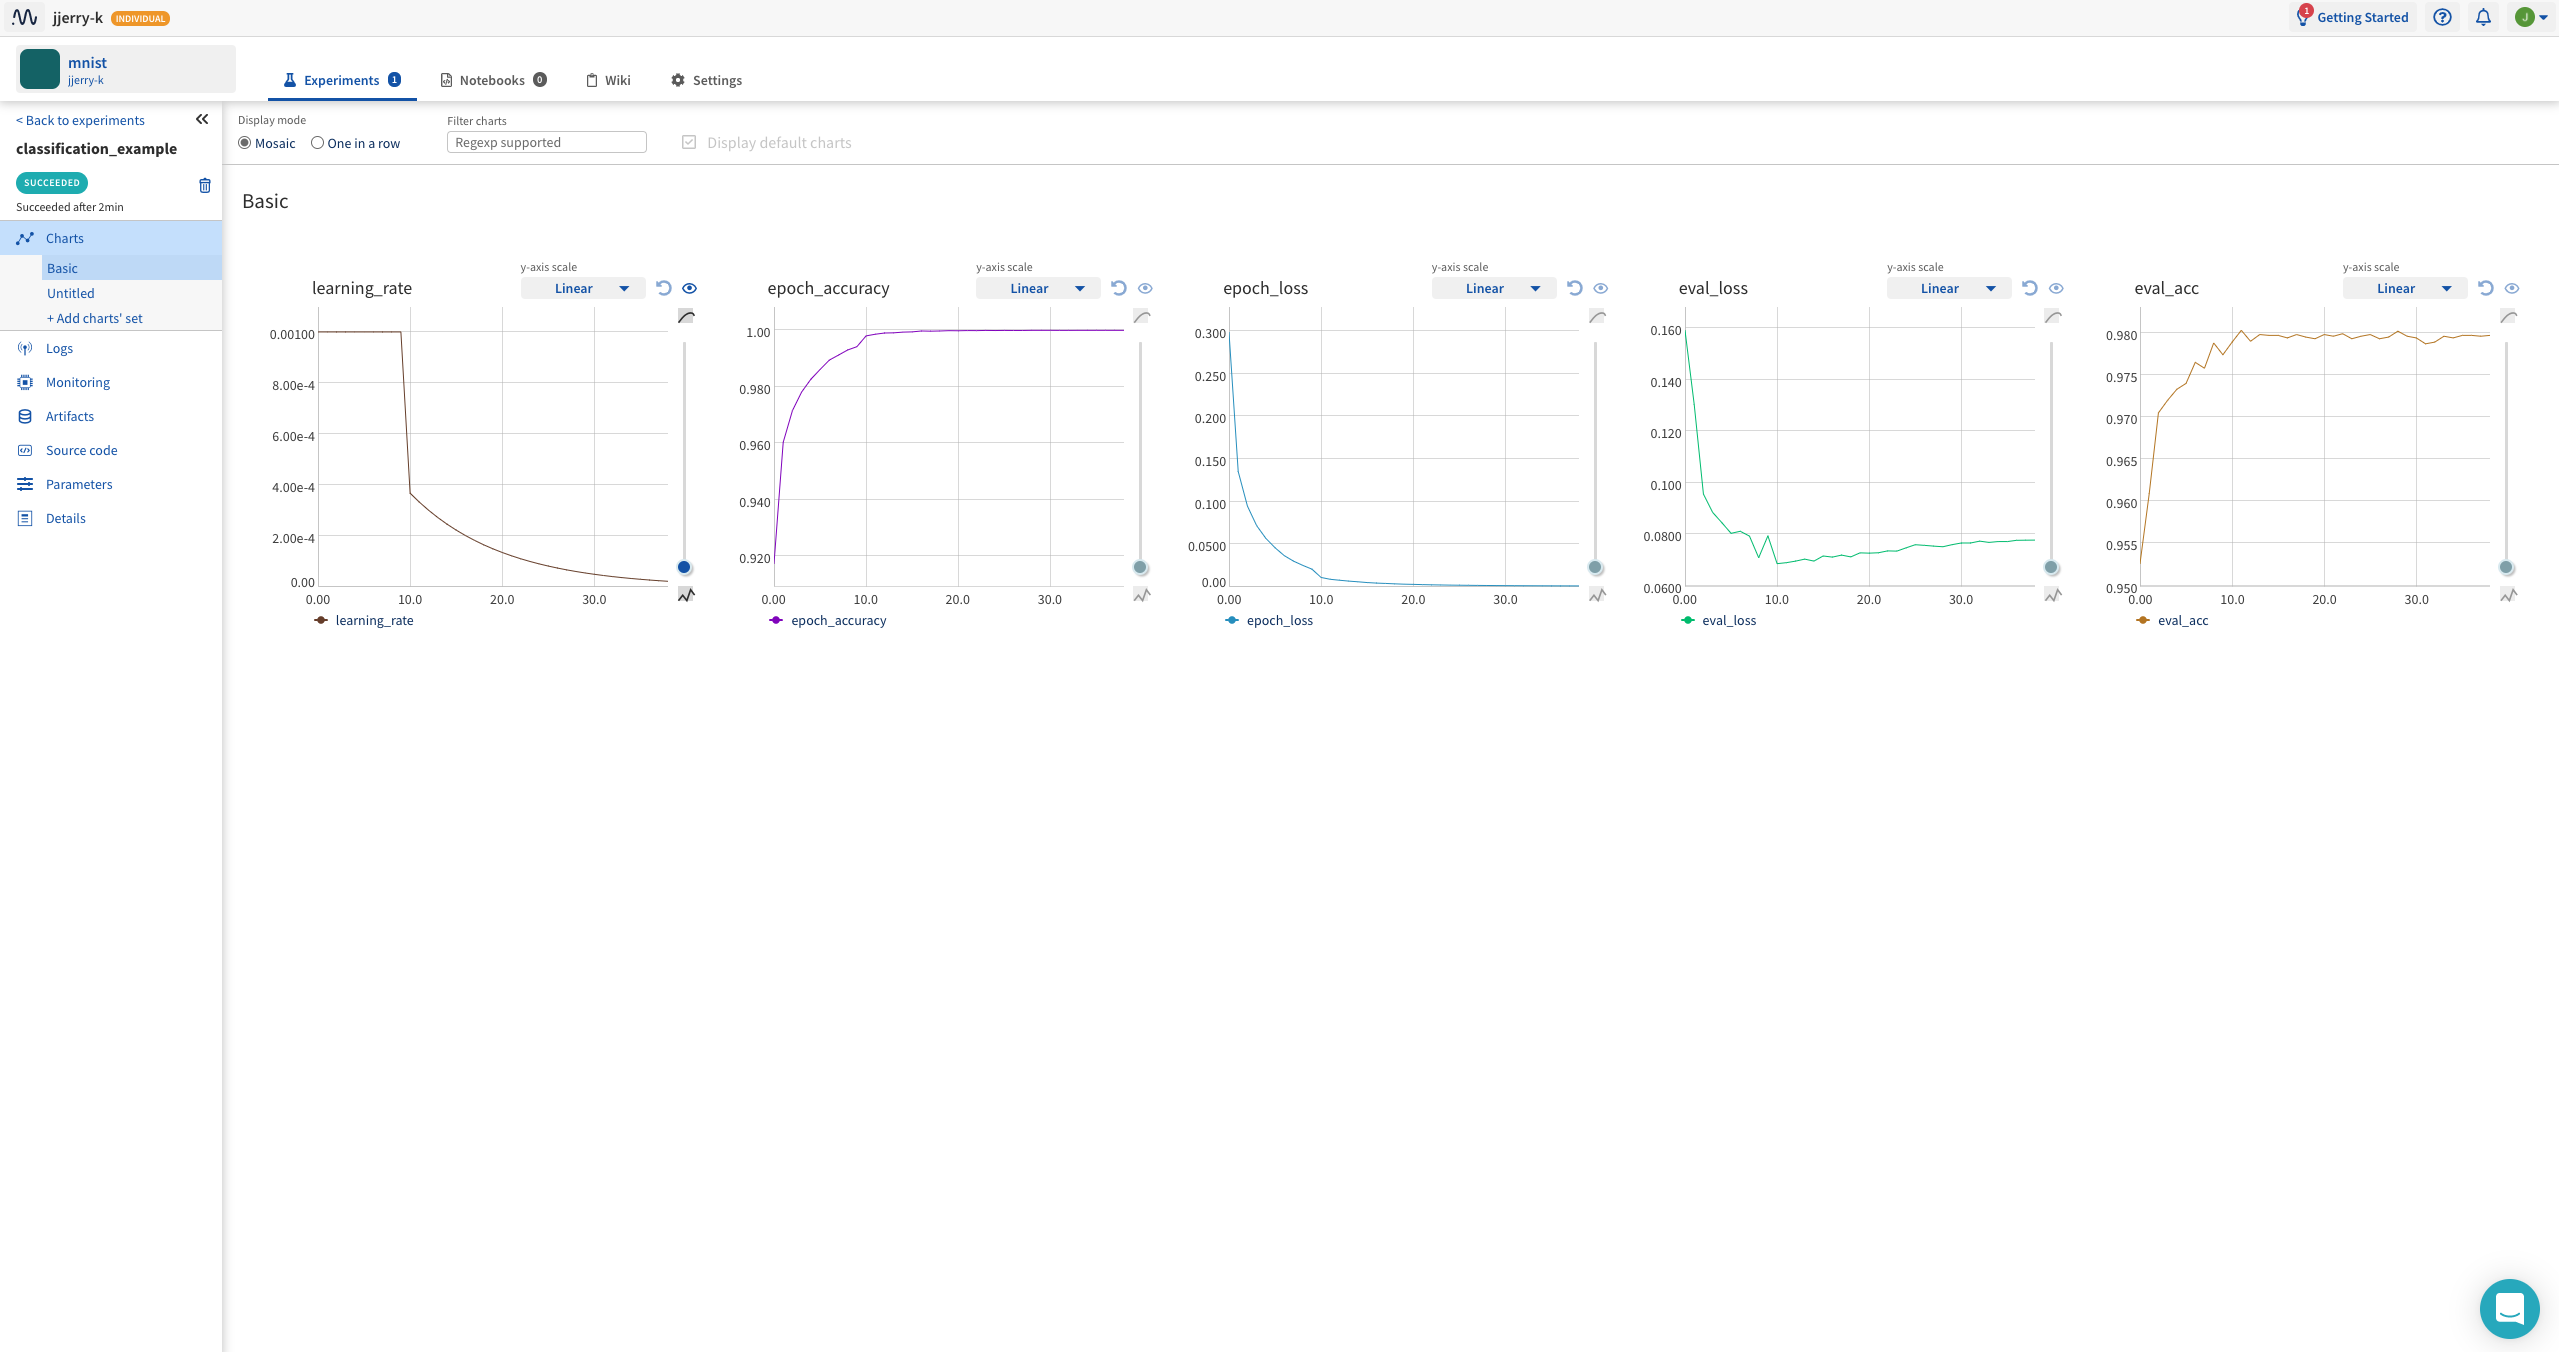
Charts에 기록된 변수의 값이 기록되고 추가적으로 neptune.log_image(), neptune.log_text() 를 사용한 변수 또한 기록됩니다.
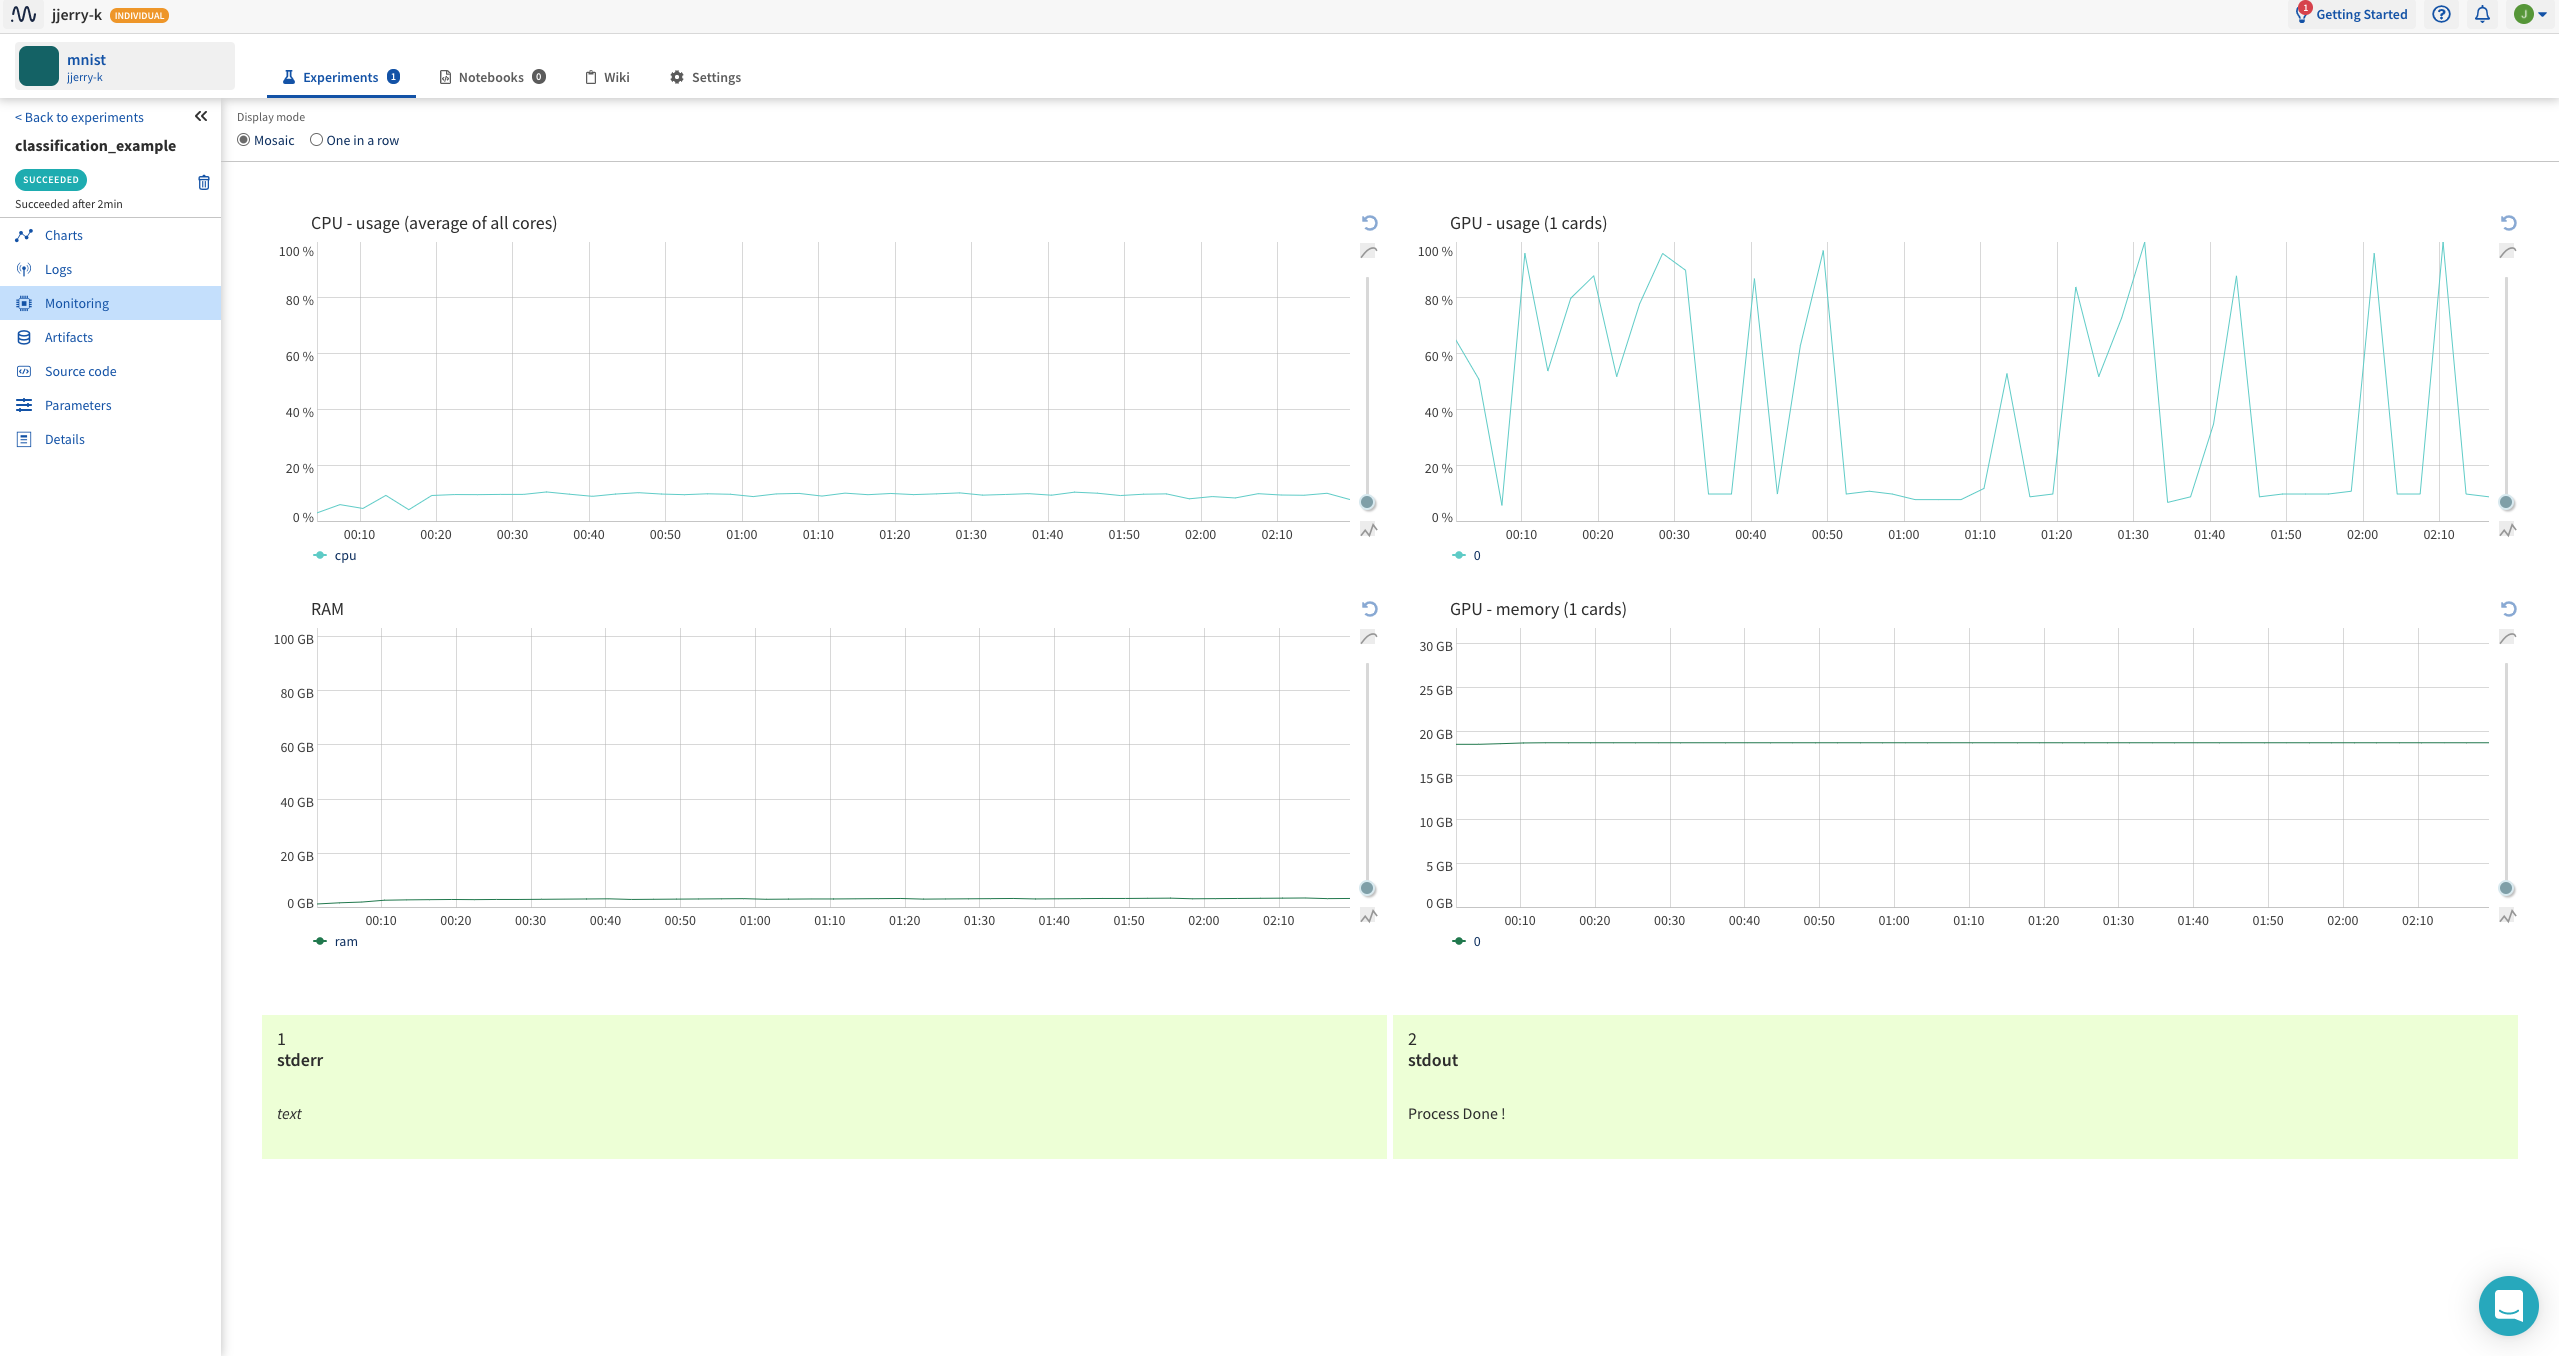
리소스 모니터링과 standard error, standard output을 볼 수 있어요.
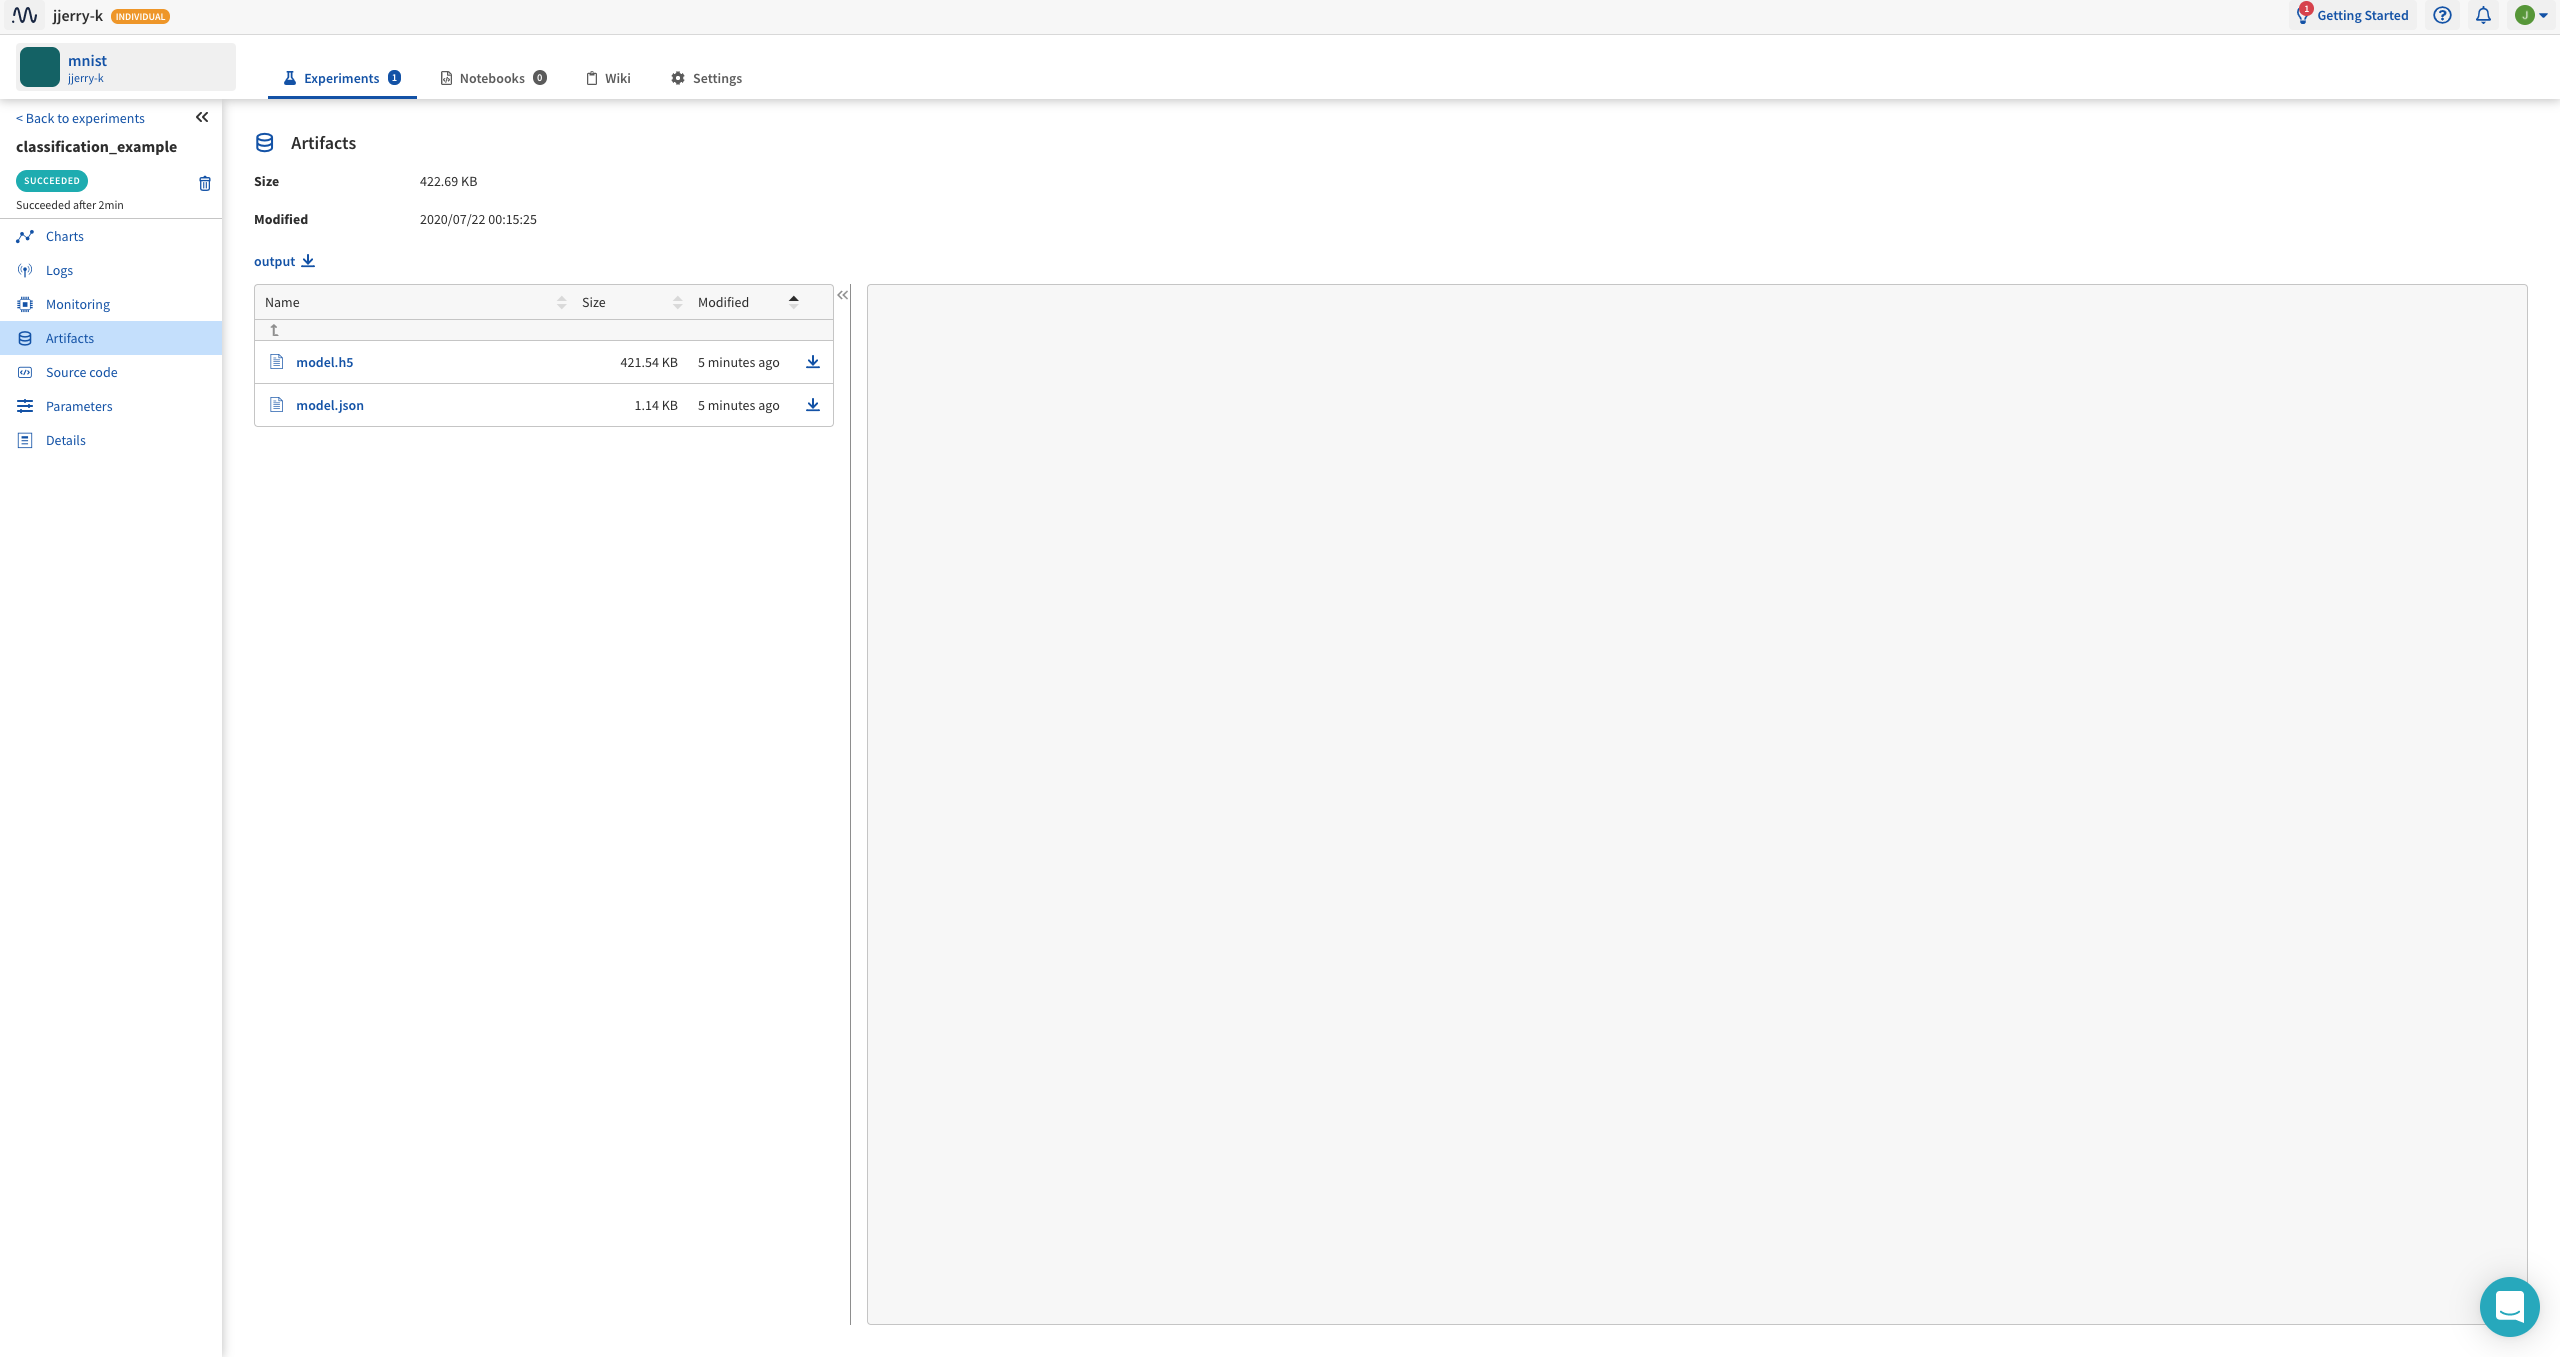
neptune에 원하는 파일을 전송하여 저장할 수 있습니다.
생략
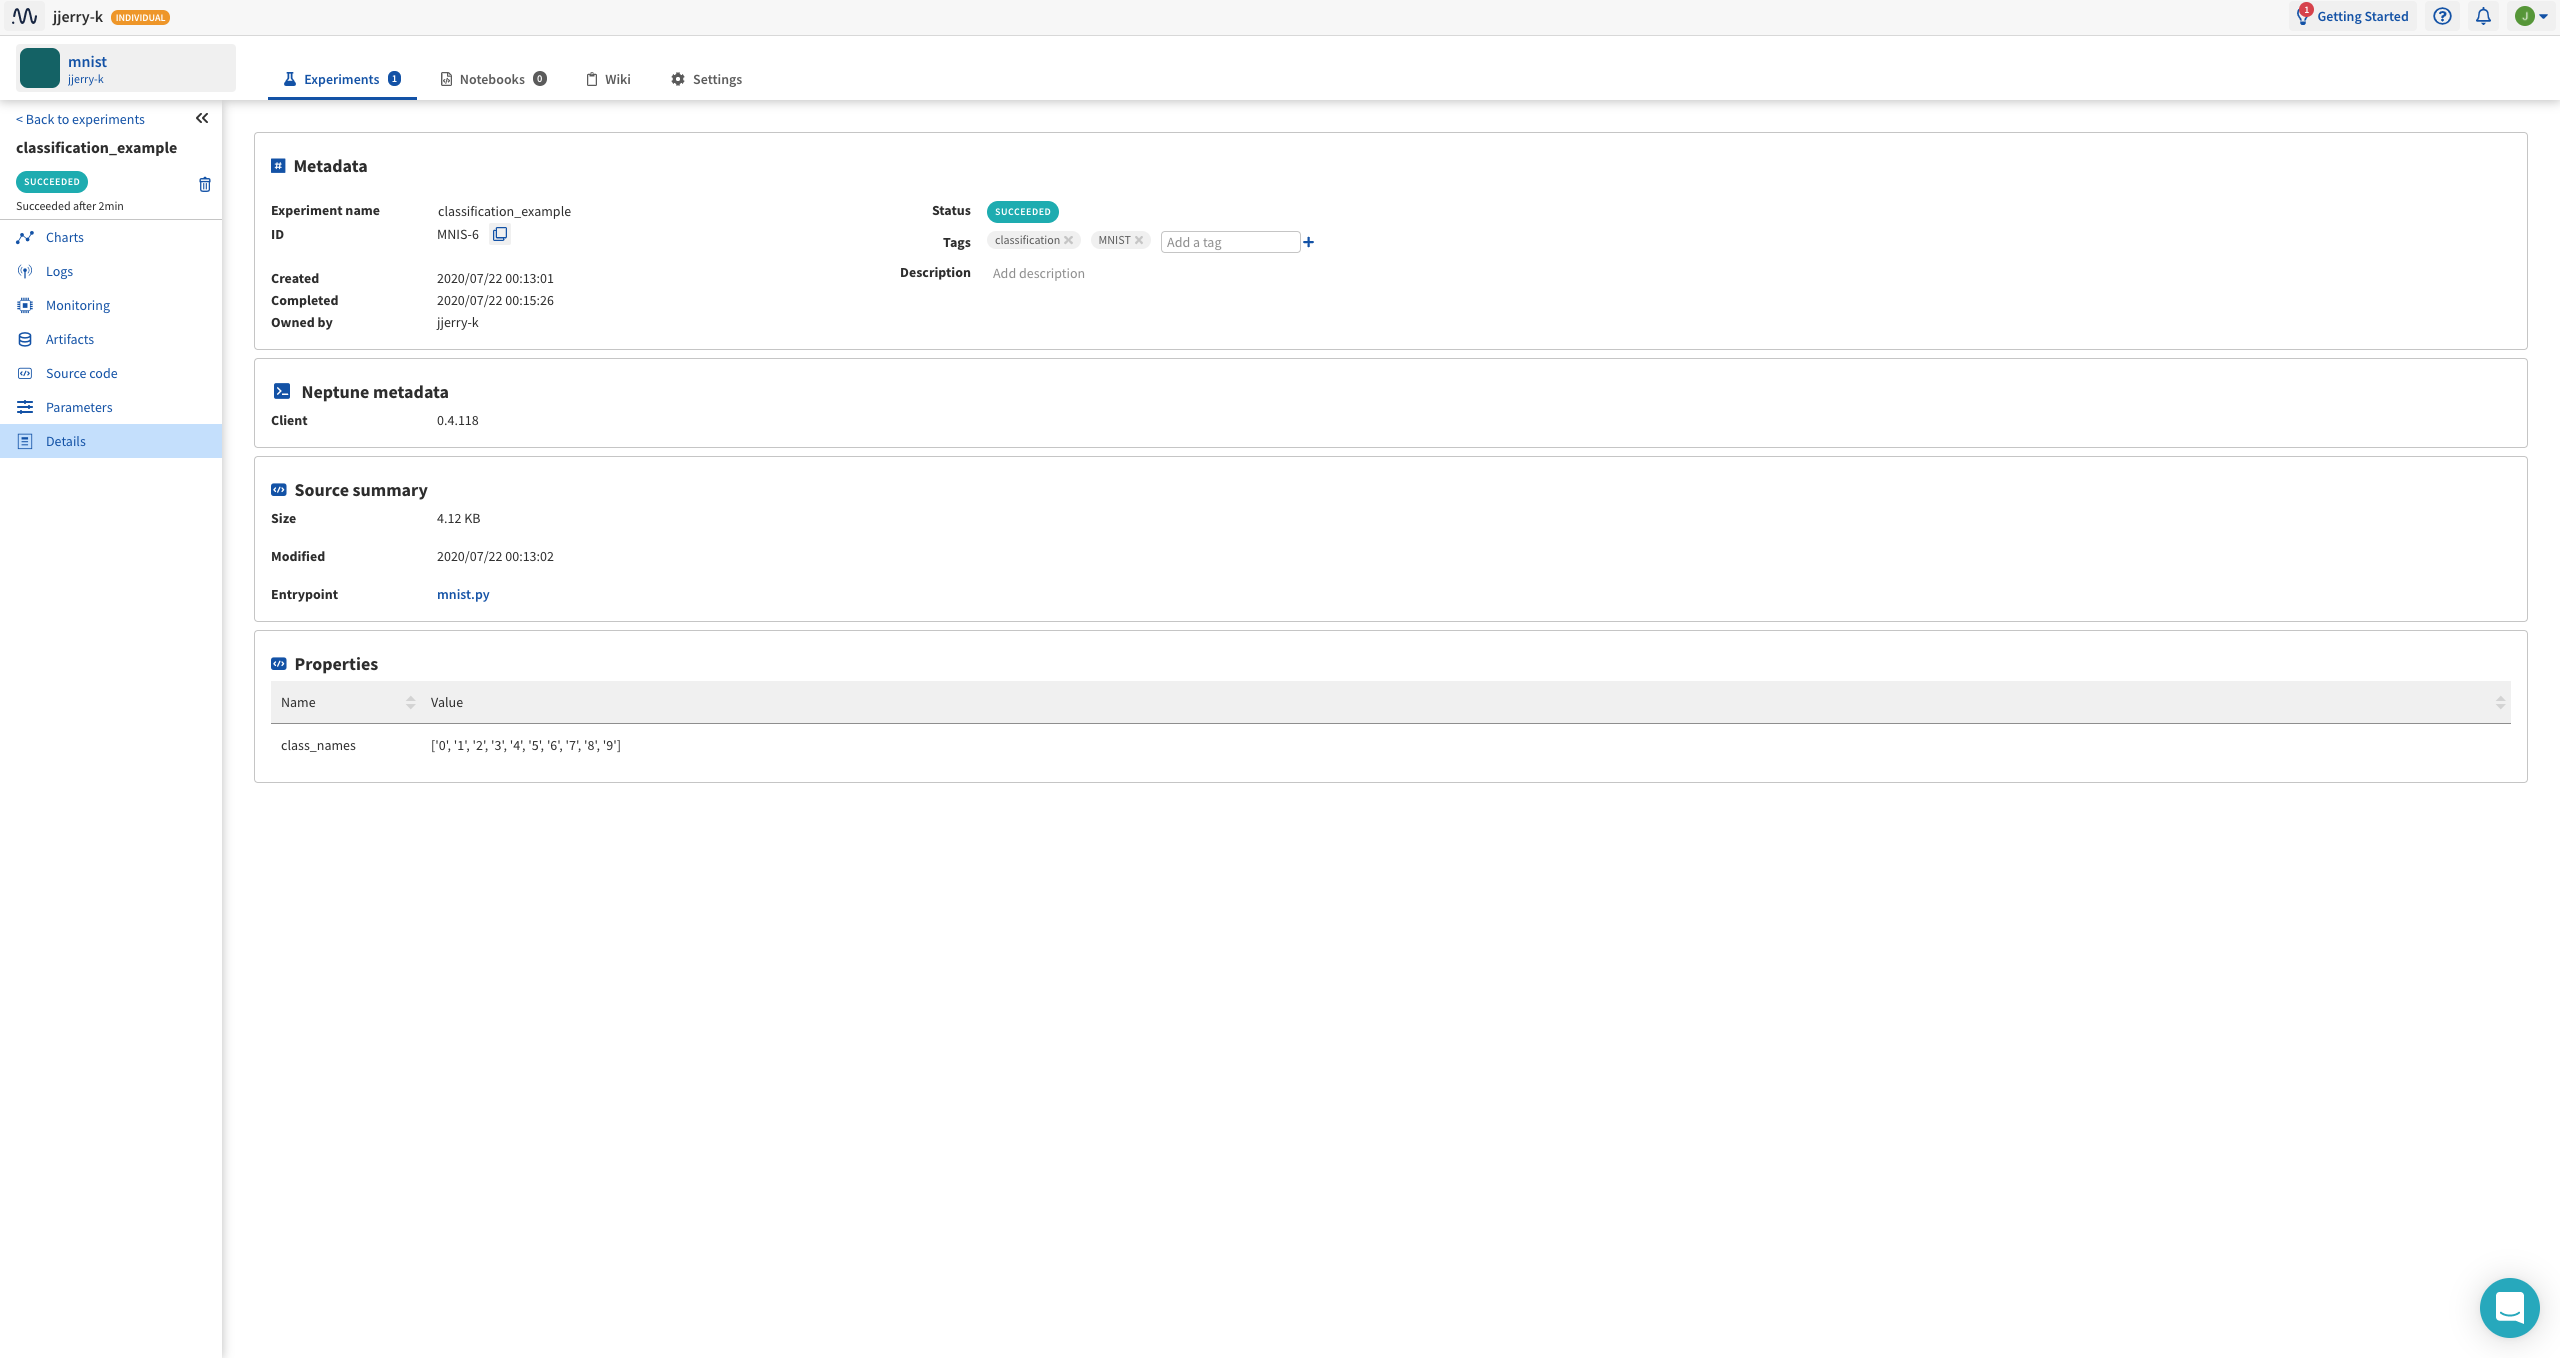
코드 상단에 적은 PARAMS 가 기록이 됩니다.
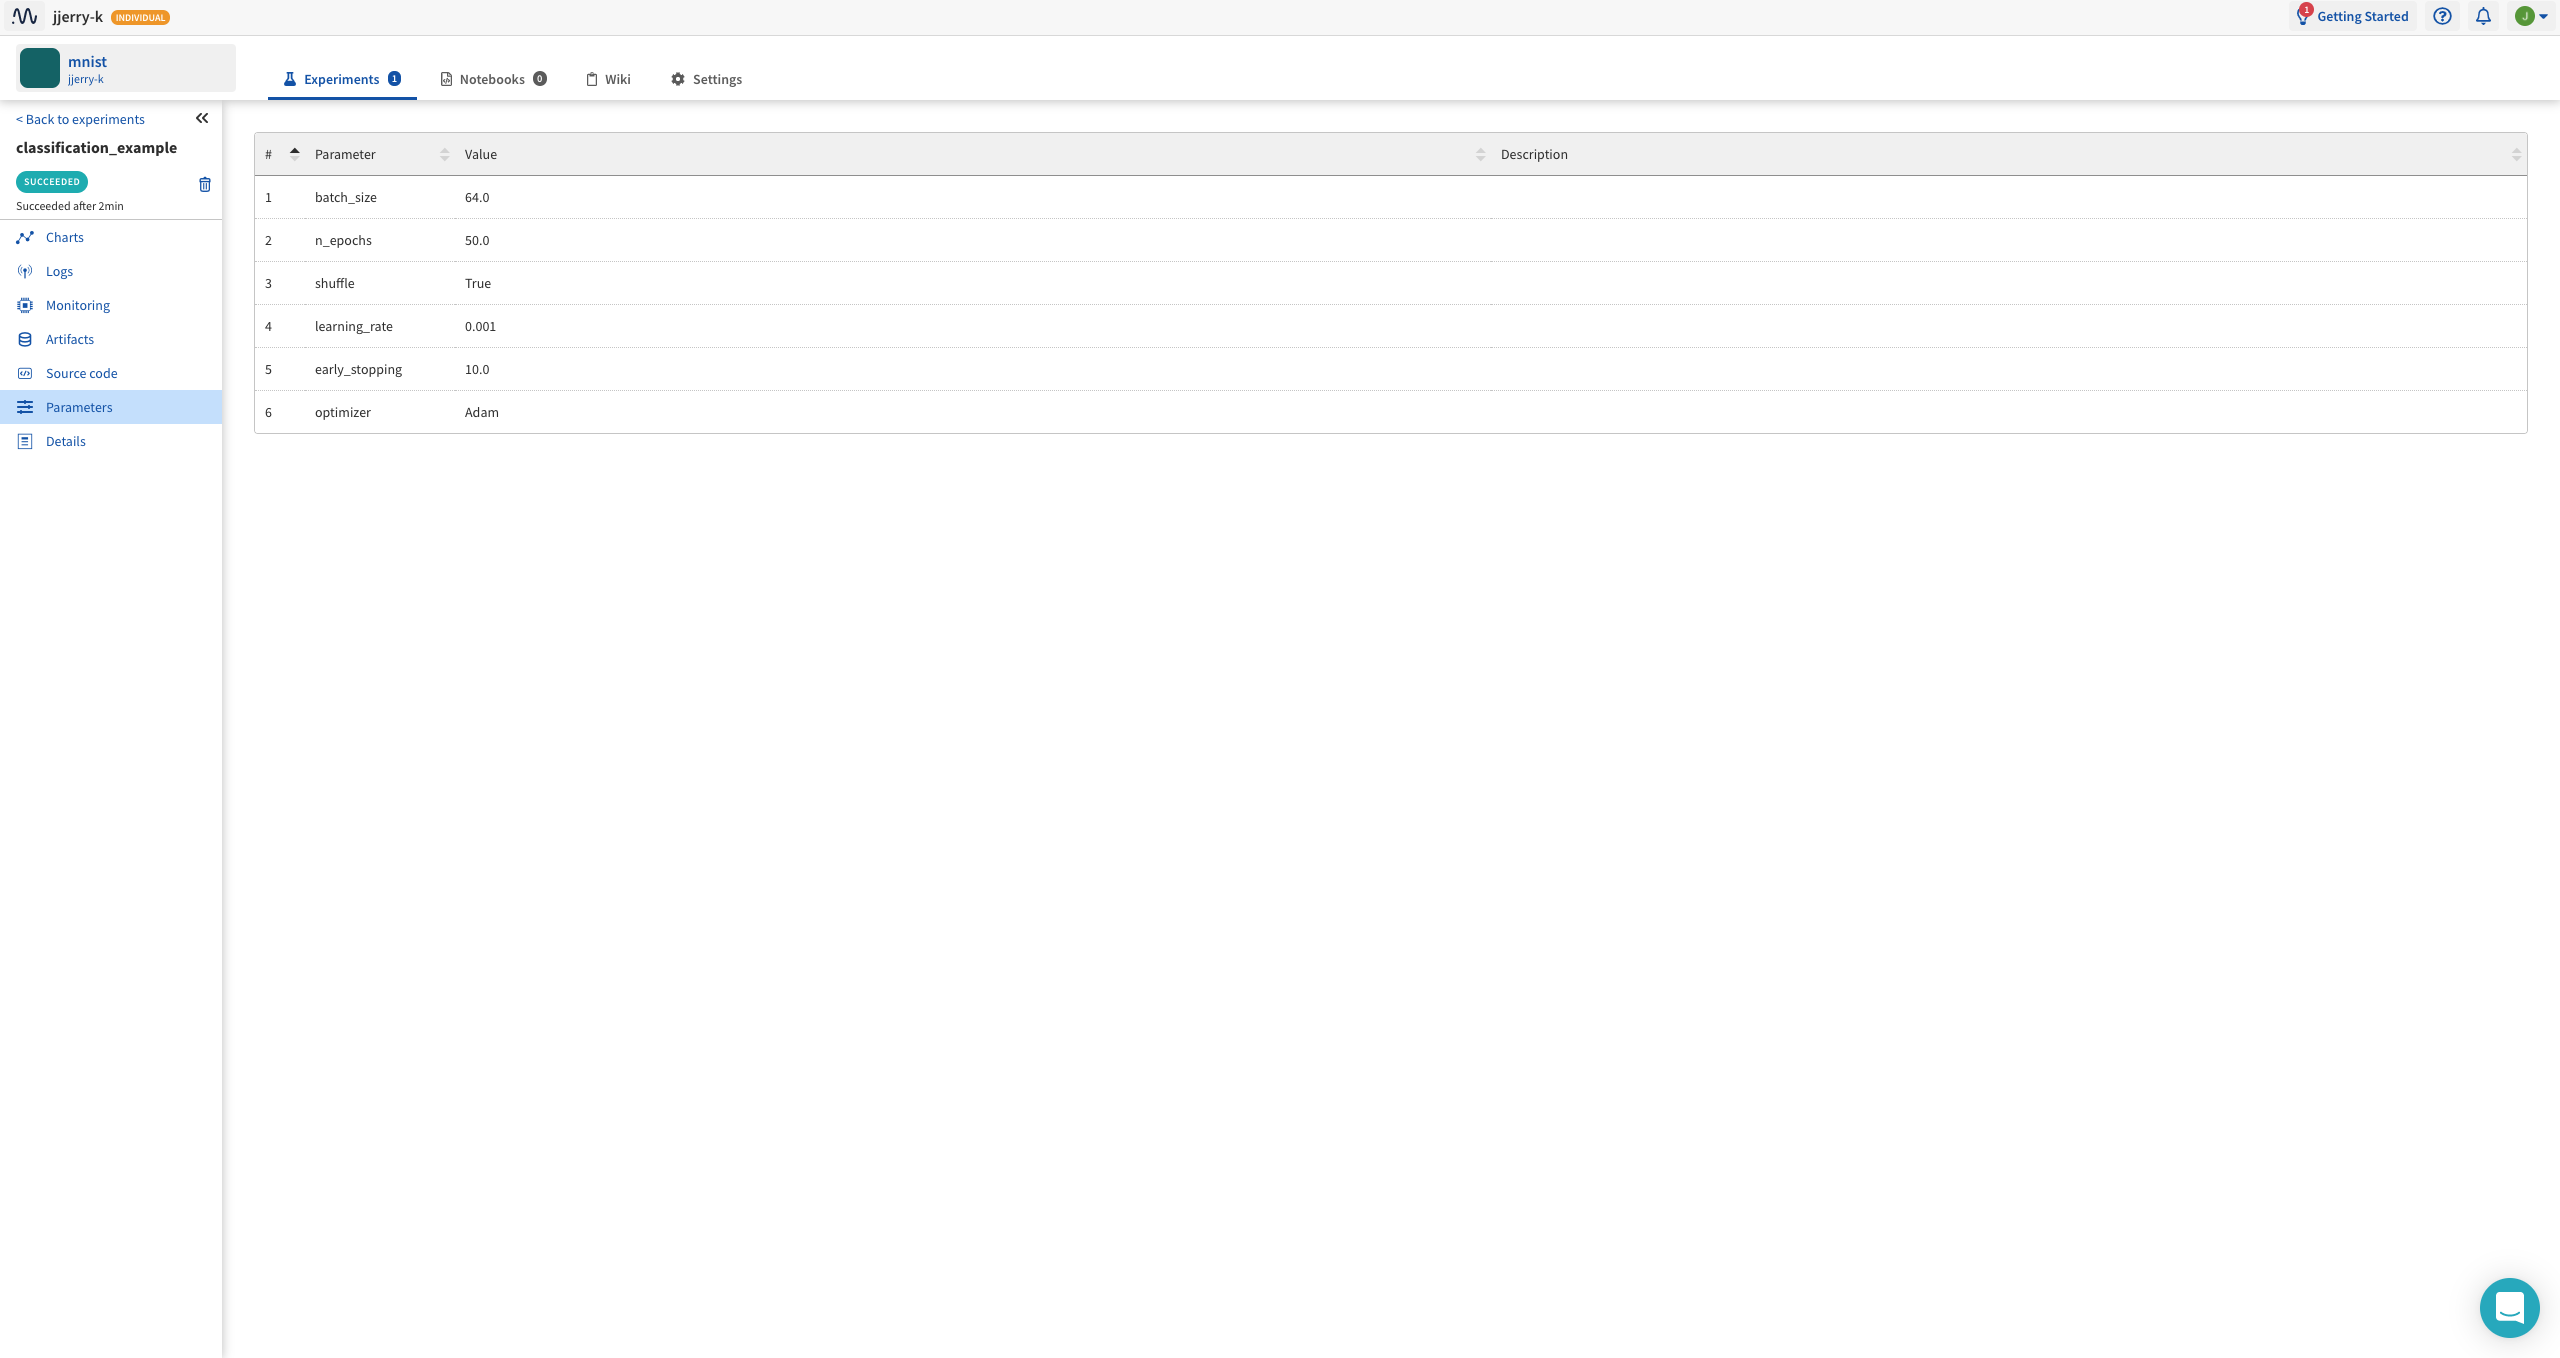
뭐…실험의 정보, 시간 등 기록이 되고 추가적으로 neptune.set_property를 이용하여 Properties 에 변수를 추가할 수 있어요!
wandb와 비슷한 역할을 하는 neptune.ai라는 tool에 대해 다루었습니다.
음….솔직히 wandb가 더 편한 듯 하네요. (코드가 짧아서)
뭐 좀 더 다양하게 사용하면 이게 더 나을…수도?
선택은 개인의 몫입니다.