
저번 포스팅에선 Raspberry Pi 와 LCD, MagicMirror를 이용하여 Smart Mirror 초기 세팅을 했습니다!
이번 포스팅에선 화면을 쵸-큼 입맛대로 바꿔보려 합니다!
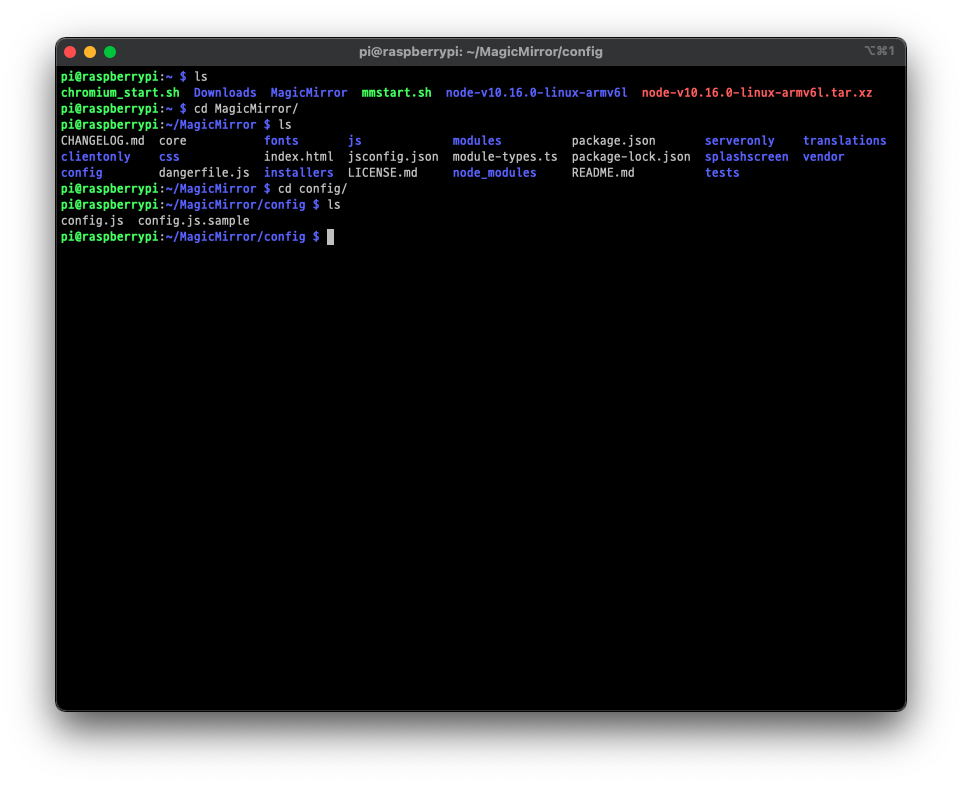
우선 MagicMirror 의 config 디렉토리로 이동해주세요!
cd ~/MagicMirror/config
거기엔 다음과 같이 config.js, config.js.sample이 있습니다!
여기서 config.js 가 화면을 구성하는 정보들이 들어가있는 파일이고 config.js.sample는 이름 그대로 sample 파일입니다!
그럼 config.js 를 한번 보겠습니다!
/* Magic Mirror Config Sample
 *
 * By Michael Teeuw https://michaelteeuw.nl
 * MIT Licensed.
 *
 * For more information on how you can configure this file
 * See https://github.com/MichMich/MagicMirror#configuration
 *
 */

var config = {
	address: "localhost", 	// Address to listen on, can be:
							// - "localhost", "127.0.0.1", "::1" to listen on loopback interface
							// - another specific IPv4/6 to listen on a specific interface
							// - "0.0.0.0", "::" to listen on any interface
							// Default, when address config is left out or empty, is "localhost"
	port: 8080,
	basePath: "/", 	// The URL path where MagicMirror is hosted. If you are using a Reverse proxy
					// you must set the sub path here. basePath must end with a /
	ipWhitelist: ["127.0.0.1", "::ffff:127.0.0.1", "::1"], 	// Set [] to allow all IP addresses
															// or add a specific IPv4 of 192.168.1.5 :
															// ["127.0.0.1", "::ffff:127.0.0.1", "::1", "::ffff:192.168.1.5"],
															// or IPv4 range of 192.168.3.0 --> 192.168.3.15 use CIDR format :
															// ["127.0.0.1", "::ffff:127.0.0.1", "::1", "::ffff:192.168.3.0/28"],

	useHttps: false, 		// Support HTTPS or not, default "false" will use HTTP
	httpsPrivateKey: "", 	// HTTPS private key path, only require when useHttps is true
	httpsCertificate: "", 	// HTTPS Certificate path, only require when useHttps is true

	language: "en",
	logLevel: ["INFO", "LOG", "WARN", "ERROR"], // Add "DEBUG" for even more logging
	timeFormat: 24,
	units: "metric",
	// serverOnly:  true/false/"local" ,
	// local for armv6l processors, default
	//   starts serveronly and then starts chrome browser
	// false, default for all NON-armv6l devices
	// true, force serveronly mode, because you want to.. no UI on this device

	modules: [
		{
			module: "alert",
		},
		{
			module: "updatenotification",
			position: "top_bar"
		},
		{
			module: "clock",
			position: "top_left"
		},
		{
			module: "calendar",
			header: "US Holidays",
			position: "top_left",
			config: {
				calendars: [
					{
						symbol: "calendar-check",
						url: "webcal://www.calendarlabs.com/ical-calendar/ics/76/US_Holidays.ics"					}
				]
			}
		},
		{
			module: "compliments",
			position: "lower_third"
		},
		{
			module: "currentweather",
			position: "top_right",
			config: {
				location: "New York",
				locationID: "5128581", //ID from http://bulk.openweathermap.org/sample/city.list.json.gz; unzip the gz file and find your city
				appid: "YOUR_OPENWEATHER_API_KEY"
			}
		},
		{
			module: "weatherforecast",
			position: "top_right",
			header: "Weather Forecast",
			config: {
				location: "New York",
				locationID: "5128581", //ID from http://bulk.openweathermap.org/sample/city.list.json.gz; unzip the gz file and find your city
				appid: "YOUR_OPENWEATHER_API_KEY"
			}
		},
		{
			module: "newsfeed",
			position: "bottom_bar",
			config: {
				feeds: [
					{
						title: "New York Times",
						url: "https://rss.nytimes.com/services/xml/rss/nyt/HomePage.xml"
					}
				],
				showSourceTitle: true,
				showPublishDate: true,
				broadcastNewsFeeds: true,
				broadcastNewsUpdates: true
			}
		},
	]
};

/*************** DO NOT EDIT THE LINE BELOW ***************/
if (typeof module !== "undefined") {module.exports = config;}
뭐… 이것 저것 많이 있네요…
그 중에서 우리가 볼 것은 modules 부분입니다!
이 부분이 어떤 기능을 어디에 넣을지 적는 부분이에요!
대충 구성을 보시면 다음과 같습니다!
  modules: [
      {
        모듈 1 정보
      },
      {
        모듈 2 정보
      },
      {
        모듈 3 정보
      },
      ...
    ]
제가 변경/추가한 모듈을 차례대로 훑어보겠습니다!
(sample의 modules 부분에 상단 세 가지 alert, updatenotification, clock는 동일하게 사용했습니다!)
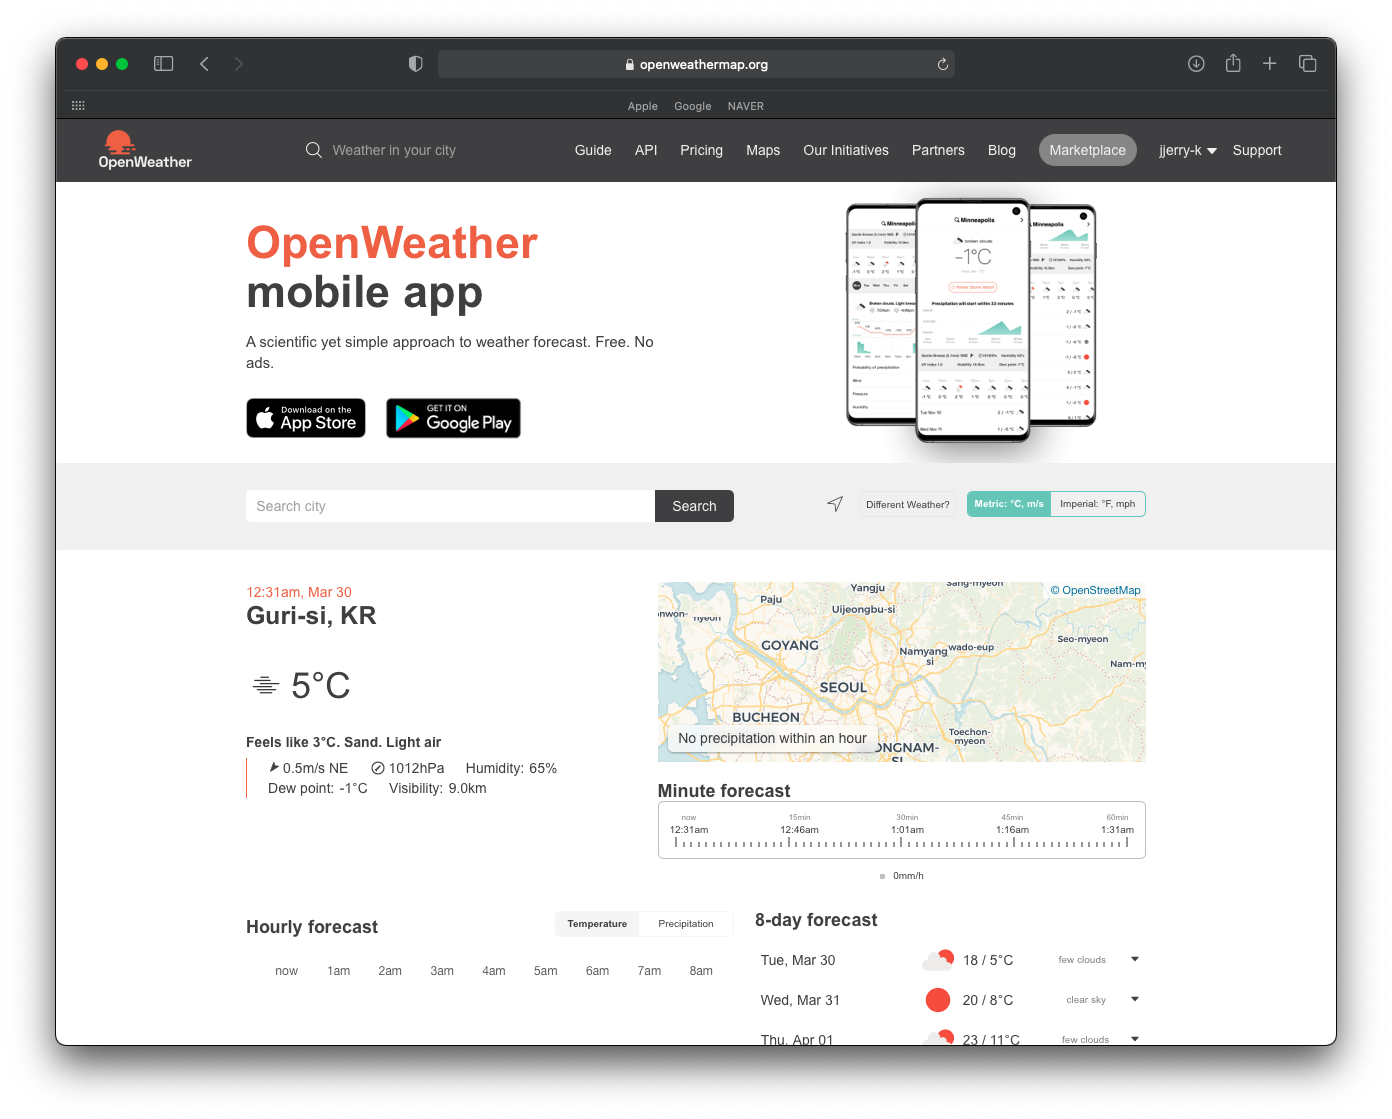
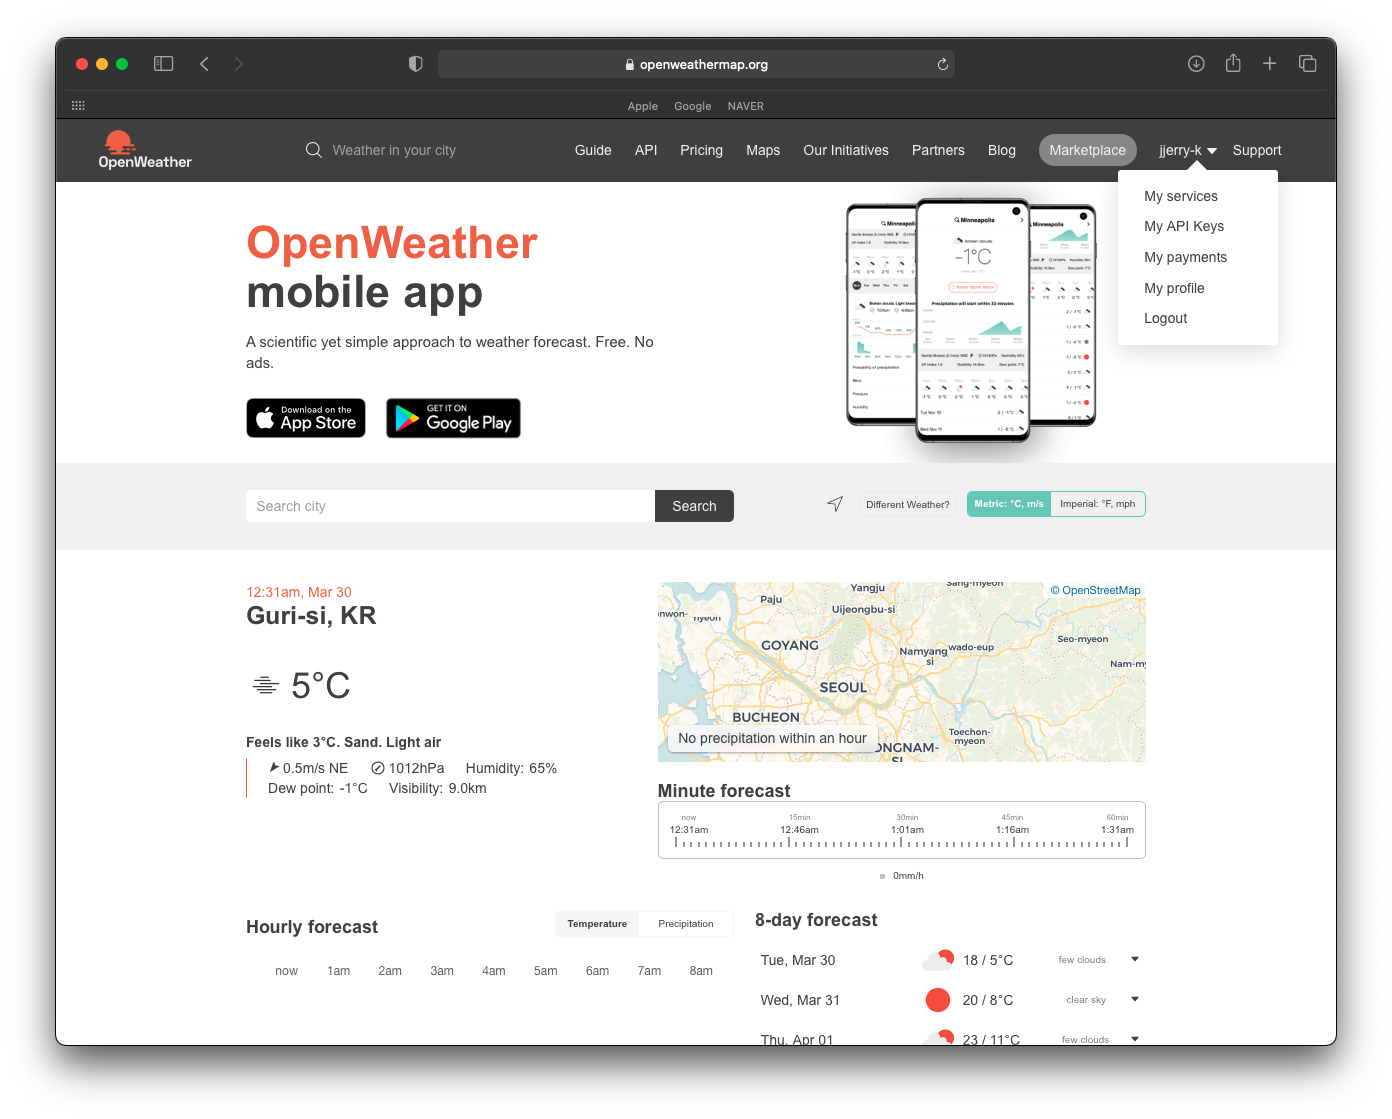
이 두 가지는 https://openweathermap.org 라는 사이트의 API를 사용합니다!
일단 가입하시고 API Key를 복사해주세요!
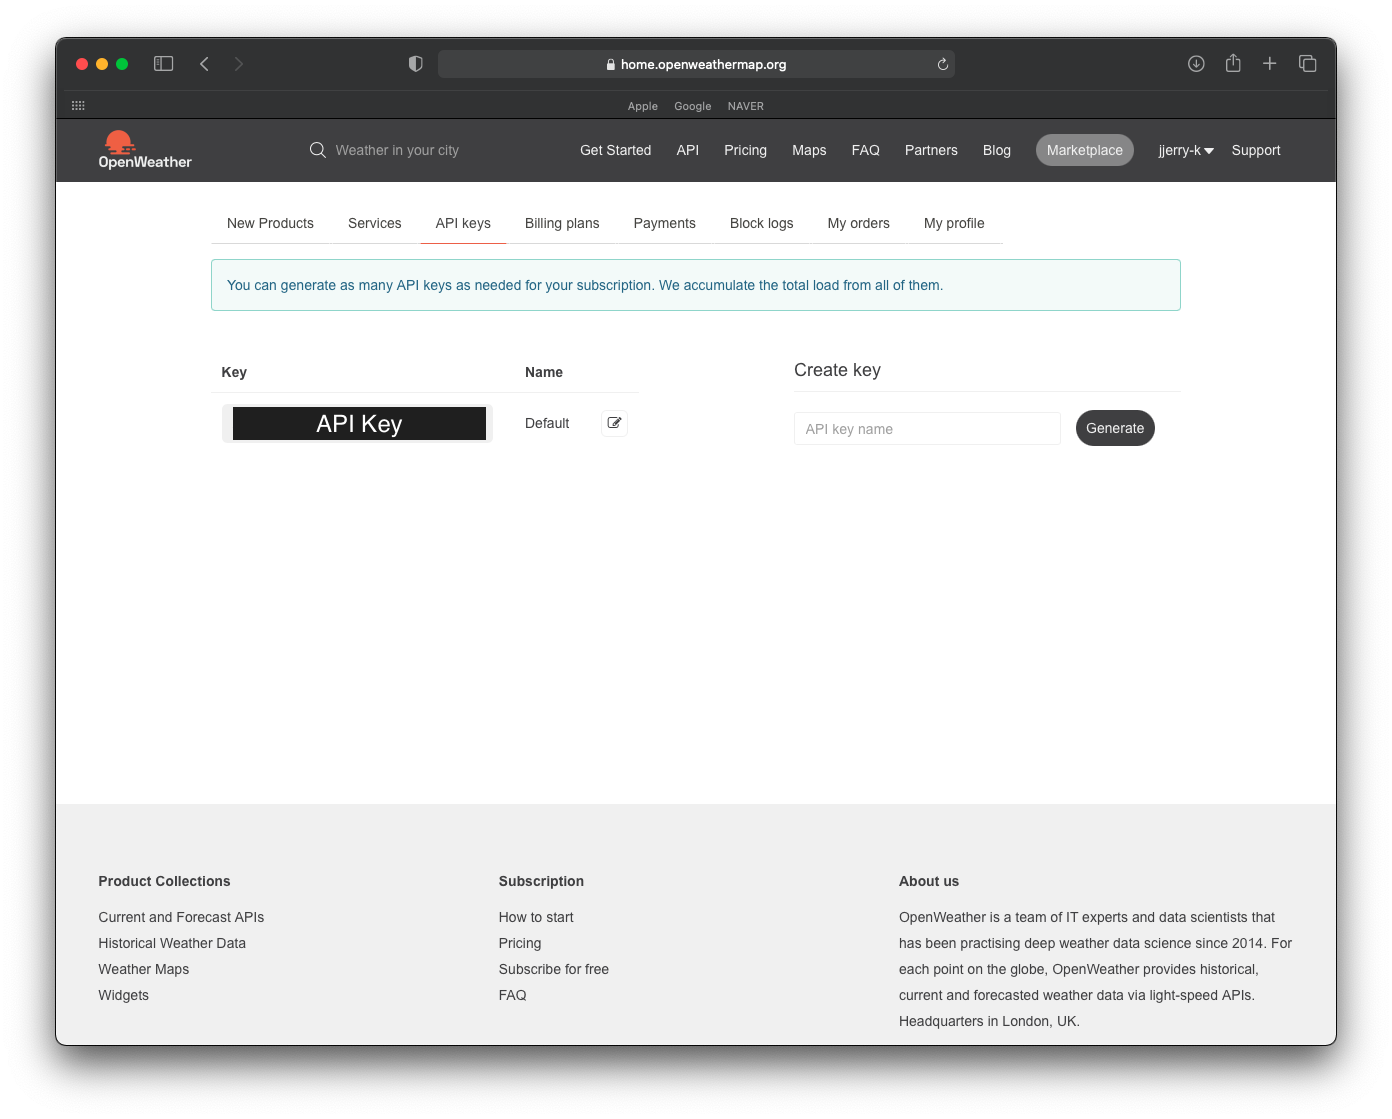
location과 locationID는 주석에 적혀있듯이 압축파일을 다운로드 & 해제하여 찾으시면 됩니다!
position 도 원하는 위치를 적어주세요! (top, bottom), (right, left, bar) 를 조합합니다!
(더 있을 것 같은데…일단은….)
    {
			module: "currentweather",
			position: "top_left",
			config: {
				location: "Seoul",
				locationID: "1835847", //ID from http://bulk.openweathermap.org/sample/city.list.json.gz; unzip the gz file and find your city
				appid: "{API KEY}" // ex) appid: "2985hcb5asdomqcmqwkodmsowmcolwm3"
			}
		}
    {
			module: "weatherforecast",
			position: "top_left",
			header: "Weather Forecast",
			config: {
				location: "Seoul",
				locationID: "1835847", //ID from http://bulk.openweathermap.org/sample/city.list.json.gz; unzip the gz file and find your city
				appid: "{API KEY}" // ex) appid: "2985hcb5asdomqcmqwkodmsowmcolwm3"
			}
		}
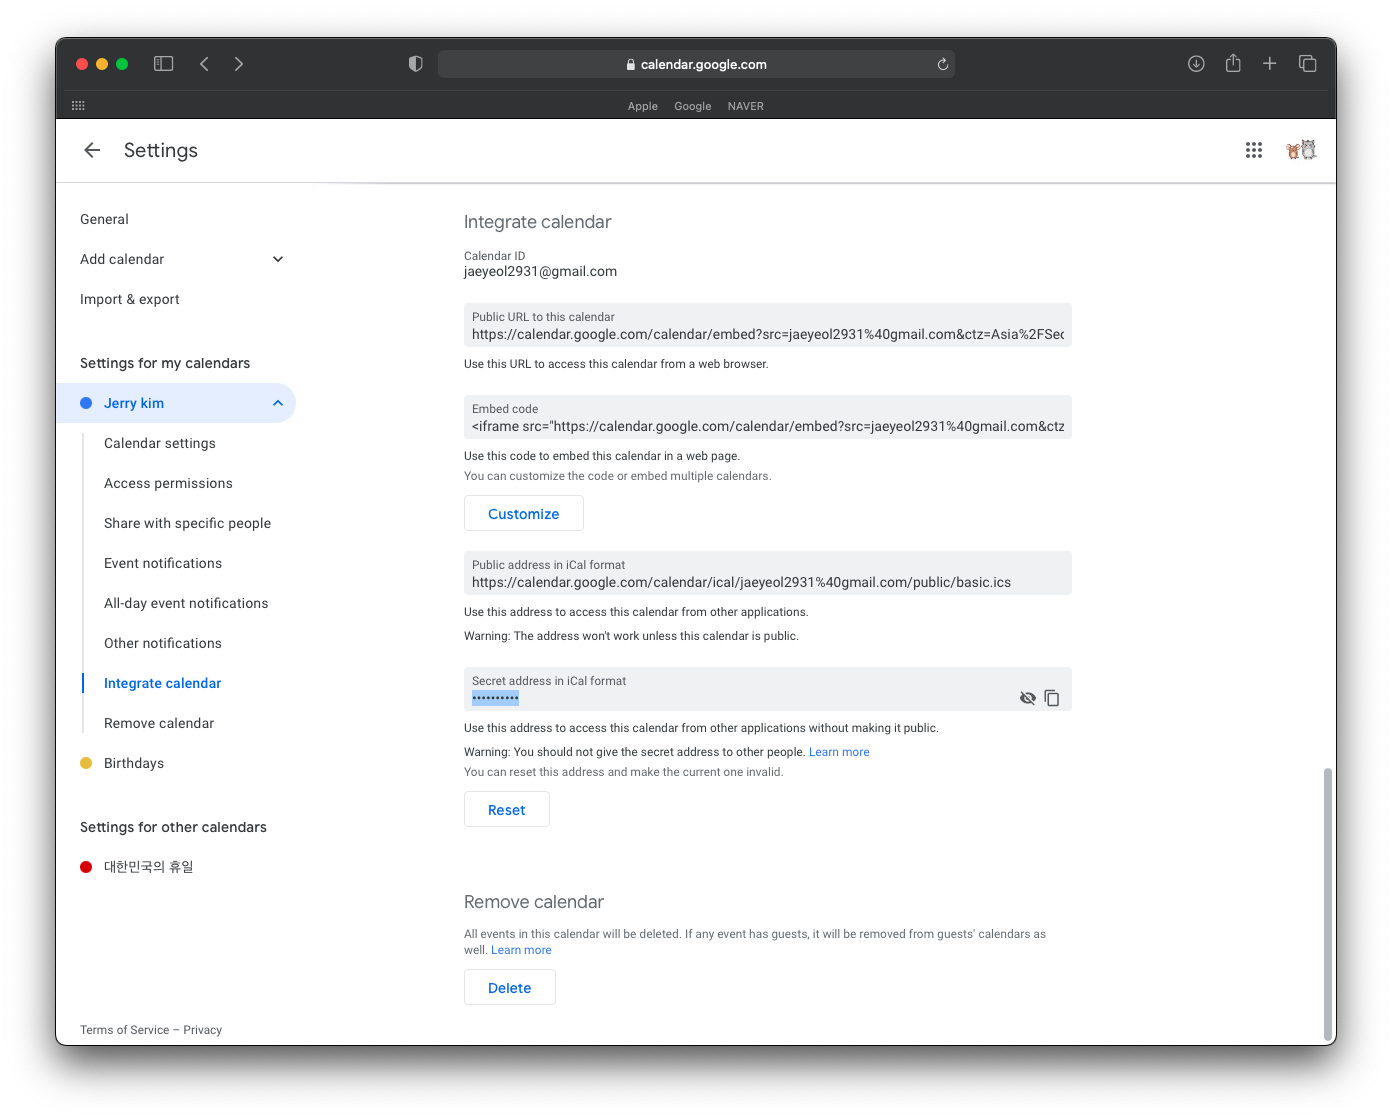
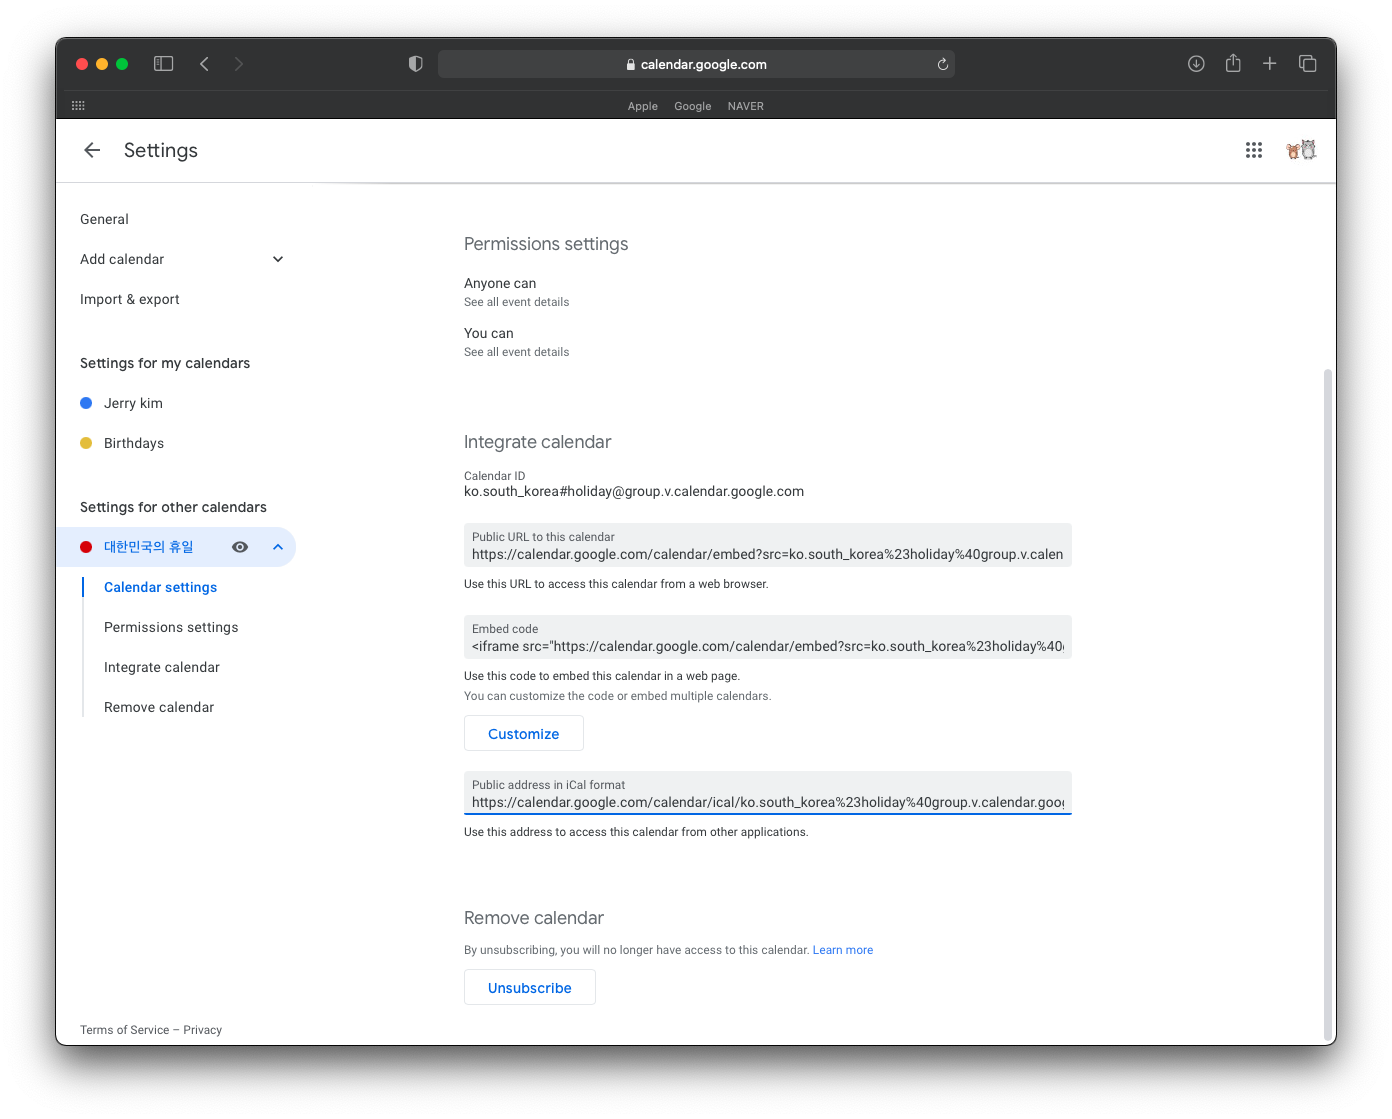
달력의 경우에는 Google calendar와 연동을 했습니다!
연동하는 방법은 간단히 말하면 구글 캘린더의 iCal format 주소를 넣으면 됩니다!
사진을 참고하세요!

오른쪽에 복사 버튼 누르셔도 되고 가리기 해제 하셔도 상관없어요!
    {
			module: "calendar",
			header: "Calendar",
			position: "top_right",
			config: {
				fetchIntervals: 50000,
				calendars:
				[
					{
						symbol: "calendar-check",
		//				url: "webcal://www.calendarlabs.com/templates/ical/SouthKorea-Holidays.ics"
						url: "https://calendar.google.com/calendar/ical/ko.south_korea%23holiday%40group.v.calendar.google.com/public/basic.ics"
					},
					{
						symbol: "clendar-check",
						url: "{개인 캘린더 iCal 주소}"
					}

				]
			}
		}
MagicMirror의 third-party module 중 하나입니다!
이름에서 알 수 있듯이 대기 상태를 알려주는 모듈이에요!
우선 다음 Command를 입력하여 MMM-AirQuality를 받아옵니다!
cd ~/MagicMirror/modules
git clone https://github.com/CFenner/MMM-AirQuality
이러면 받아오기 끝이에요!
그러고나서 config.js에 아래와 같이 module을 추가합니다!
    {
			module: "MMM-AirQuality",
			position: "top_right",
			config: {
				location: "seoul"
			}
    }
뉴스 정보를 받아오는 부분입니다!
딱히…설명 드릴게 없네요..ㅎㅎ
JTBC랑 Google news 둘 다 보려했는데 JTBC 밖에 안나오는 느낌….적인 느낌..
    {
			module: "newsfeed",
			position: "bottom_bar",
			config: {
				feeds: [
					{
						title: "JTBC",
						url: "http://fs.jtbc.joins.com/RSS/newsflash.xml",
						ref: "http://news.jtbc.joins.com/Etc/RssService.aspx"
					},
					{
						title: "Google News",
						url: "https://news.google.com/rxx?hl=ko&gl=KR&ceid=KR:ko"
					}
				],
				showSourceTitle: true,
				showPublishDate: true,
				broadcastNewsFeeds: true,
				broadcastNewsUpdates: true
			}
		}
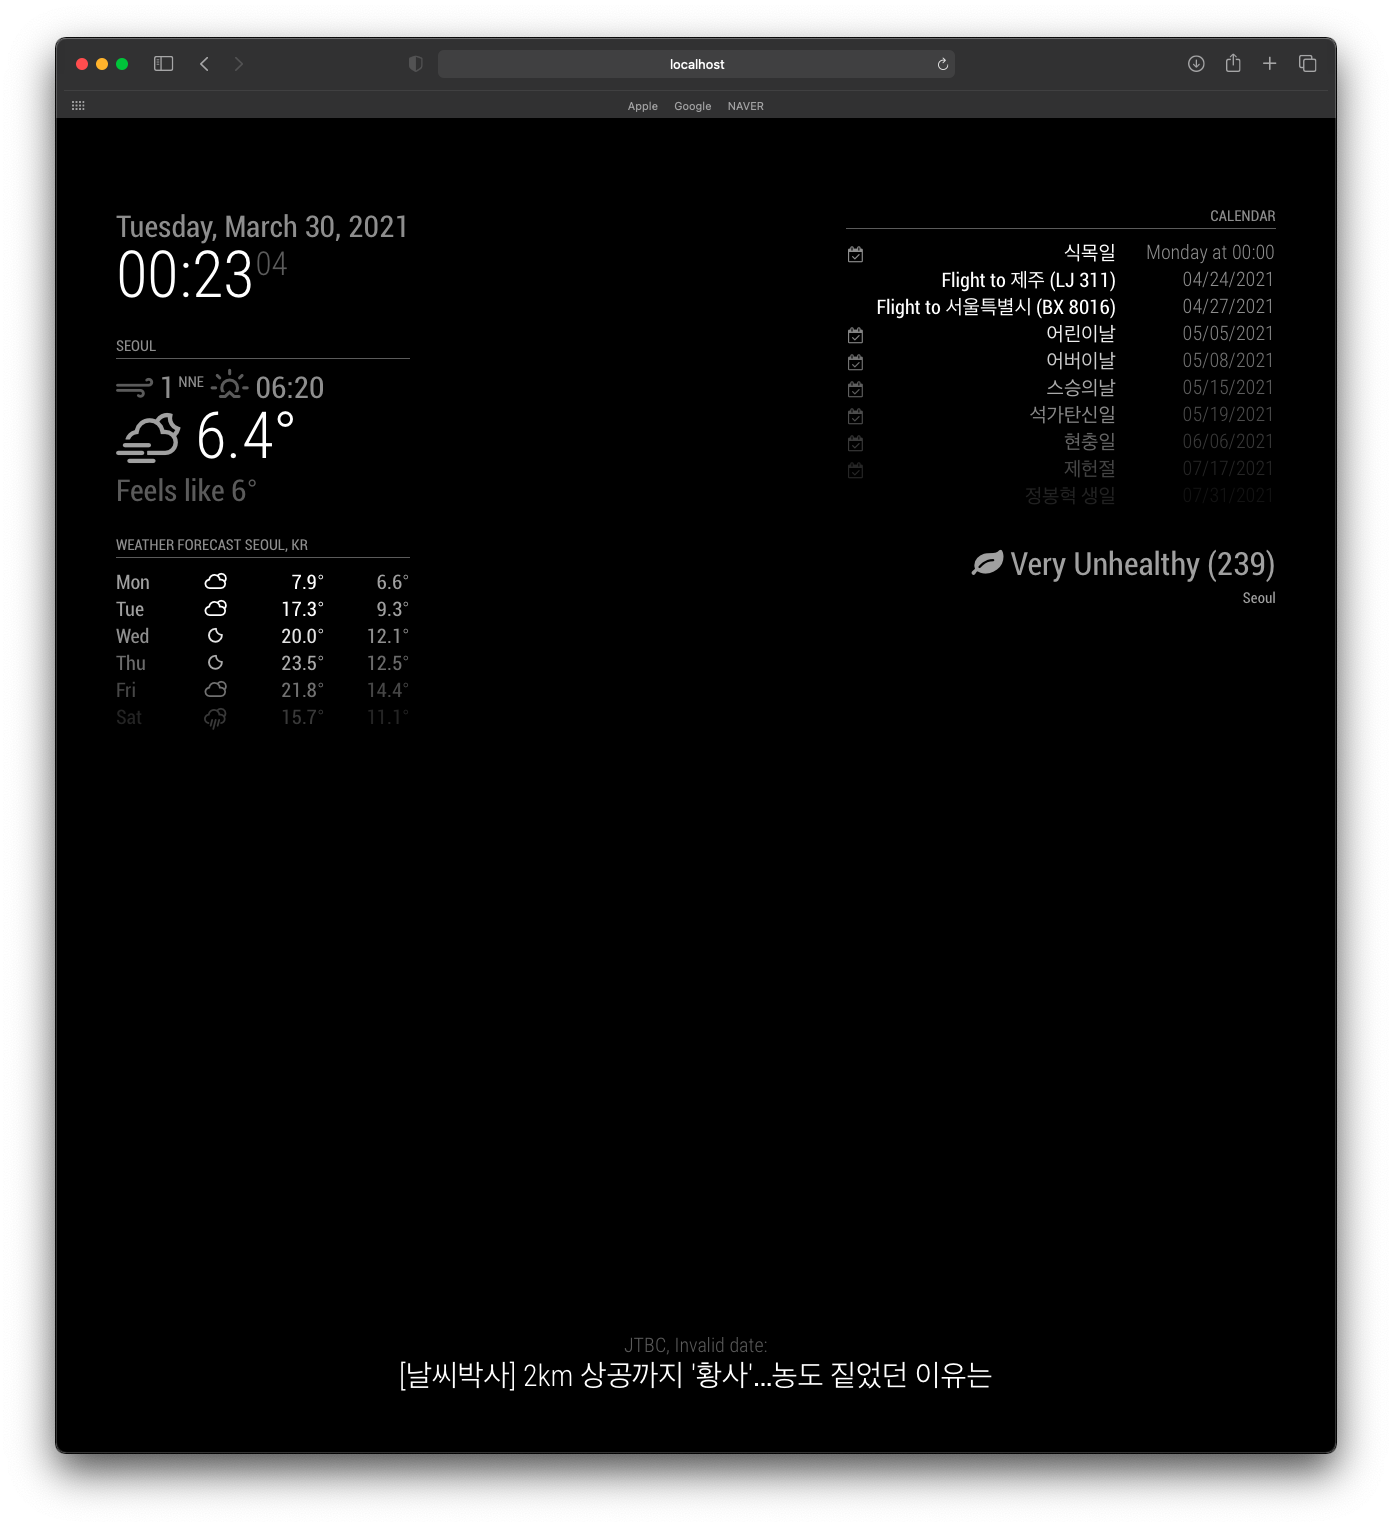
이렇게 config.js를 수정하고 나면 다음과 같은 화면을 볼 수 있습니다!
아! 이 화면은 Raspberry Pi 의 8080 포트와 로컬의 8080 포트를 터널링하면 볼 수 있습니다!
후…정말 간단한 Customizing 이 끝났네요..
이젠 뭘 더 추가해볼지, 프레임을 어떻게 짤지…계획해봐야겠습니다!